Common symptoms
Gate stuck open (Open High Priority)
The gate will not respond to open or close commands. Usually the key switch.
Gate opens randomly (Queue Out of Sync)
The gate cycles open with no car present and the queue backs up.
Gate not opening (Programming Mode)
The gate works by hand but ignores FlexWash. Usually the programming mode.
Network Configuration
- Press the circle button below the screen to open the main menu.
- Select the “Ethernet” option.
- Select “Network Settings”.
- Make sure that DHCP is enabled.
- Power cycle the gate.
- Repeat the steps and go back to “Network Settings”.
- Make sure that the IP address starts with 172.162.184.X as it is shown in the image below:

Static IP Address
Some Magnetic gates do not support DHCP, even though the setting is present in the menu. DHCP remains our preferred method, but we can assign a static IP address when necessary. This procedure requires on-prem technical expertise.1
Note the gate's current IP address
Open the main menu on the gate’s digital display and go to “Settings > Ethernet > Network Settings”. Record the IP address shown. In this example the gate is at 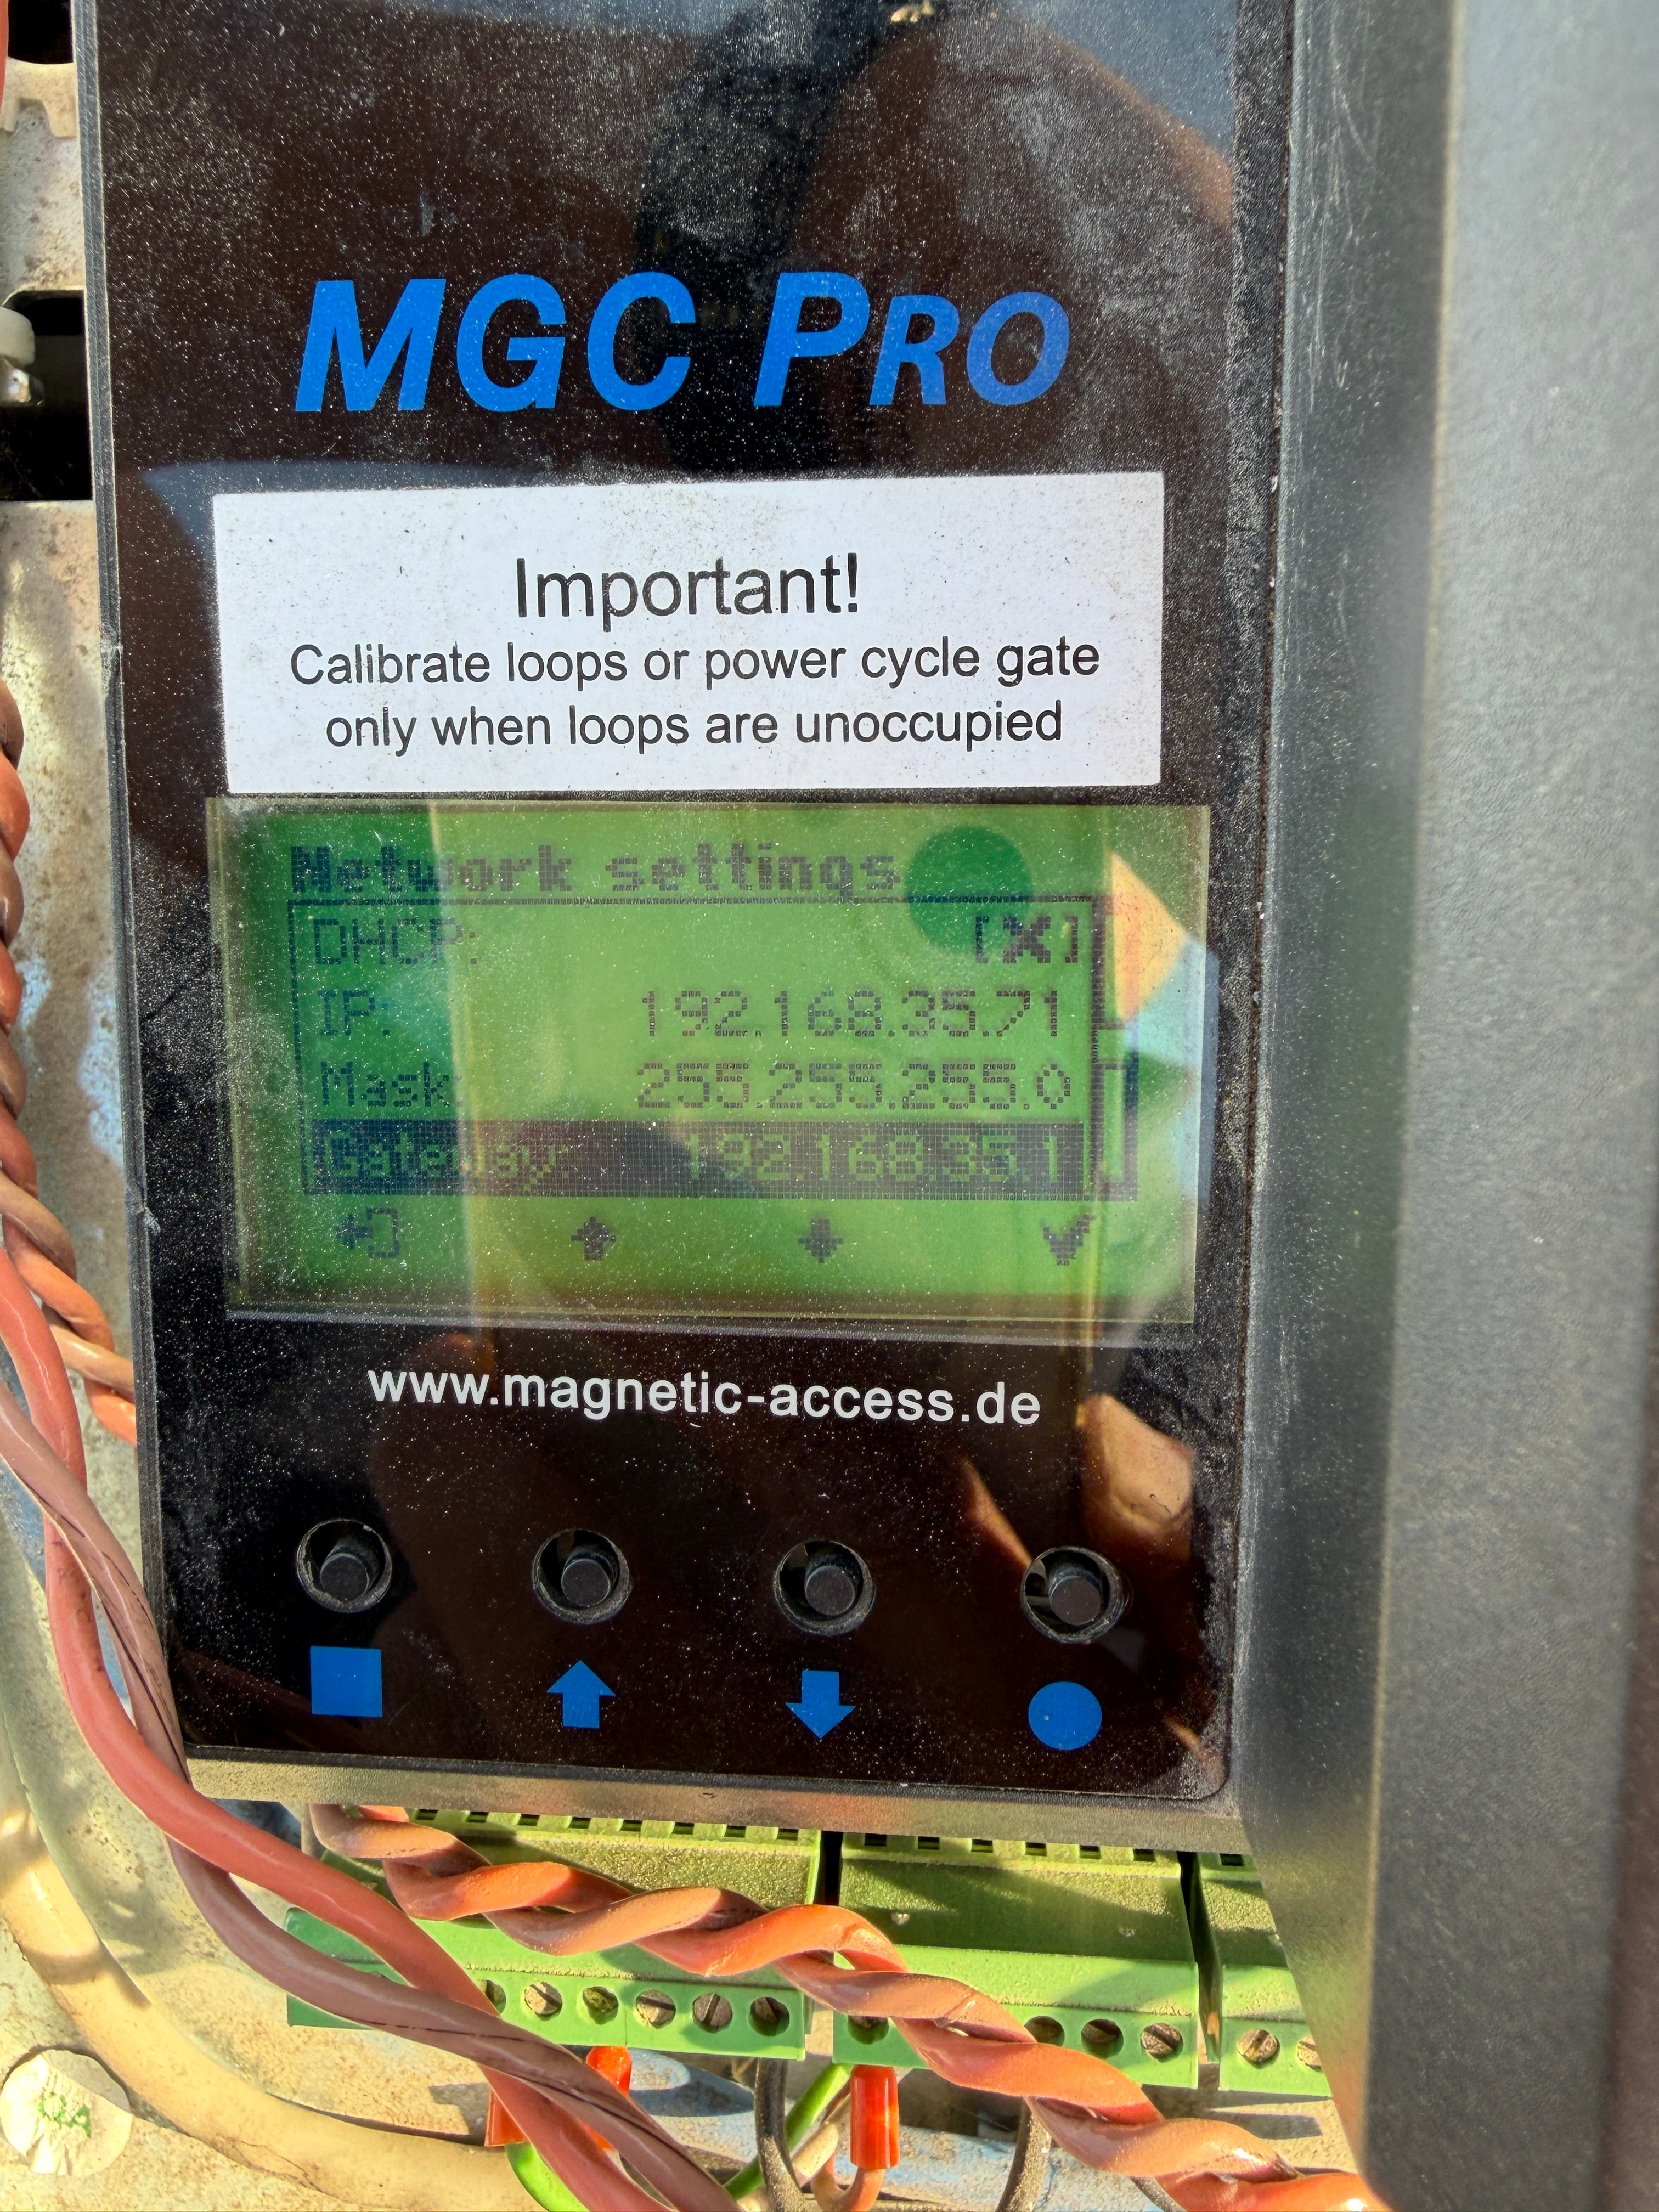
192.168.35.71.2
Connect a laptop directly to the gate
Plug a laptop into the gate’s ethernet module. Set that ethernet interface to configure IPv4 manually and choose an address in the same subnet as the gate, but not identical to it. In this example the laptop uses 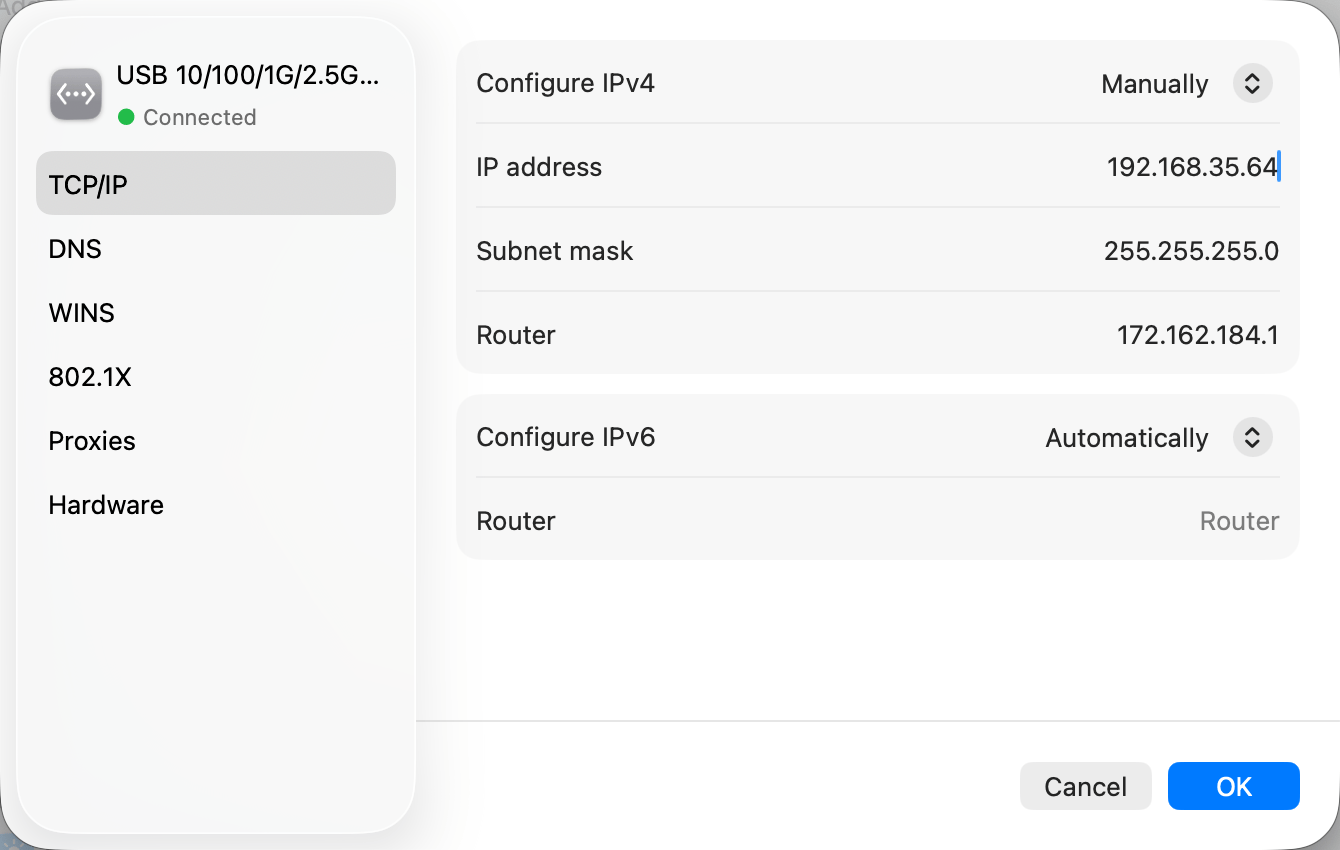
192.168.35.64.3
Confirm the connection is stable
Ping the gate’s current IP address. Let the test run for a few seconds, then stop it and confirm 0% packet loss.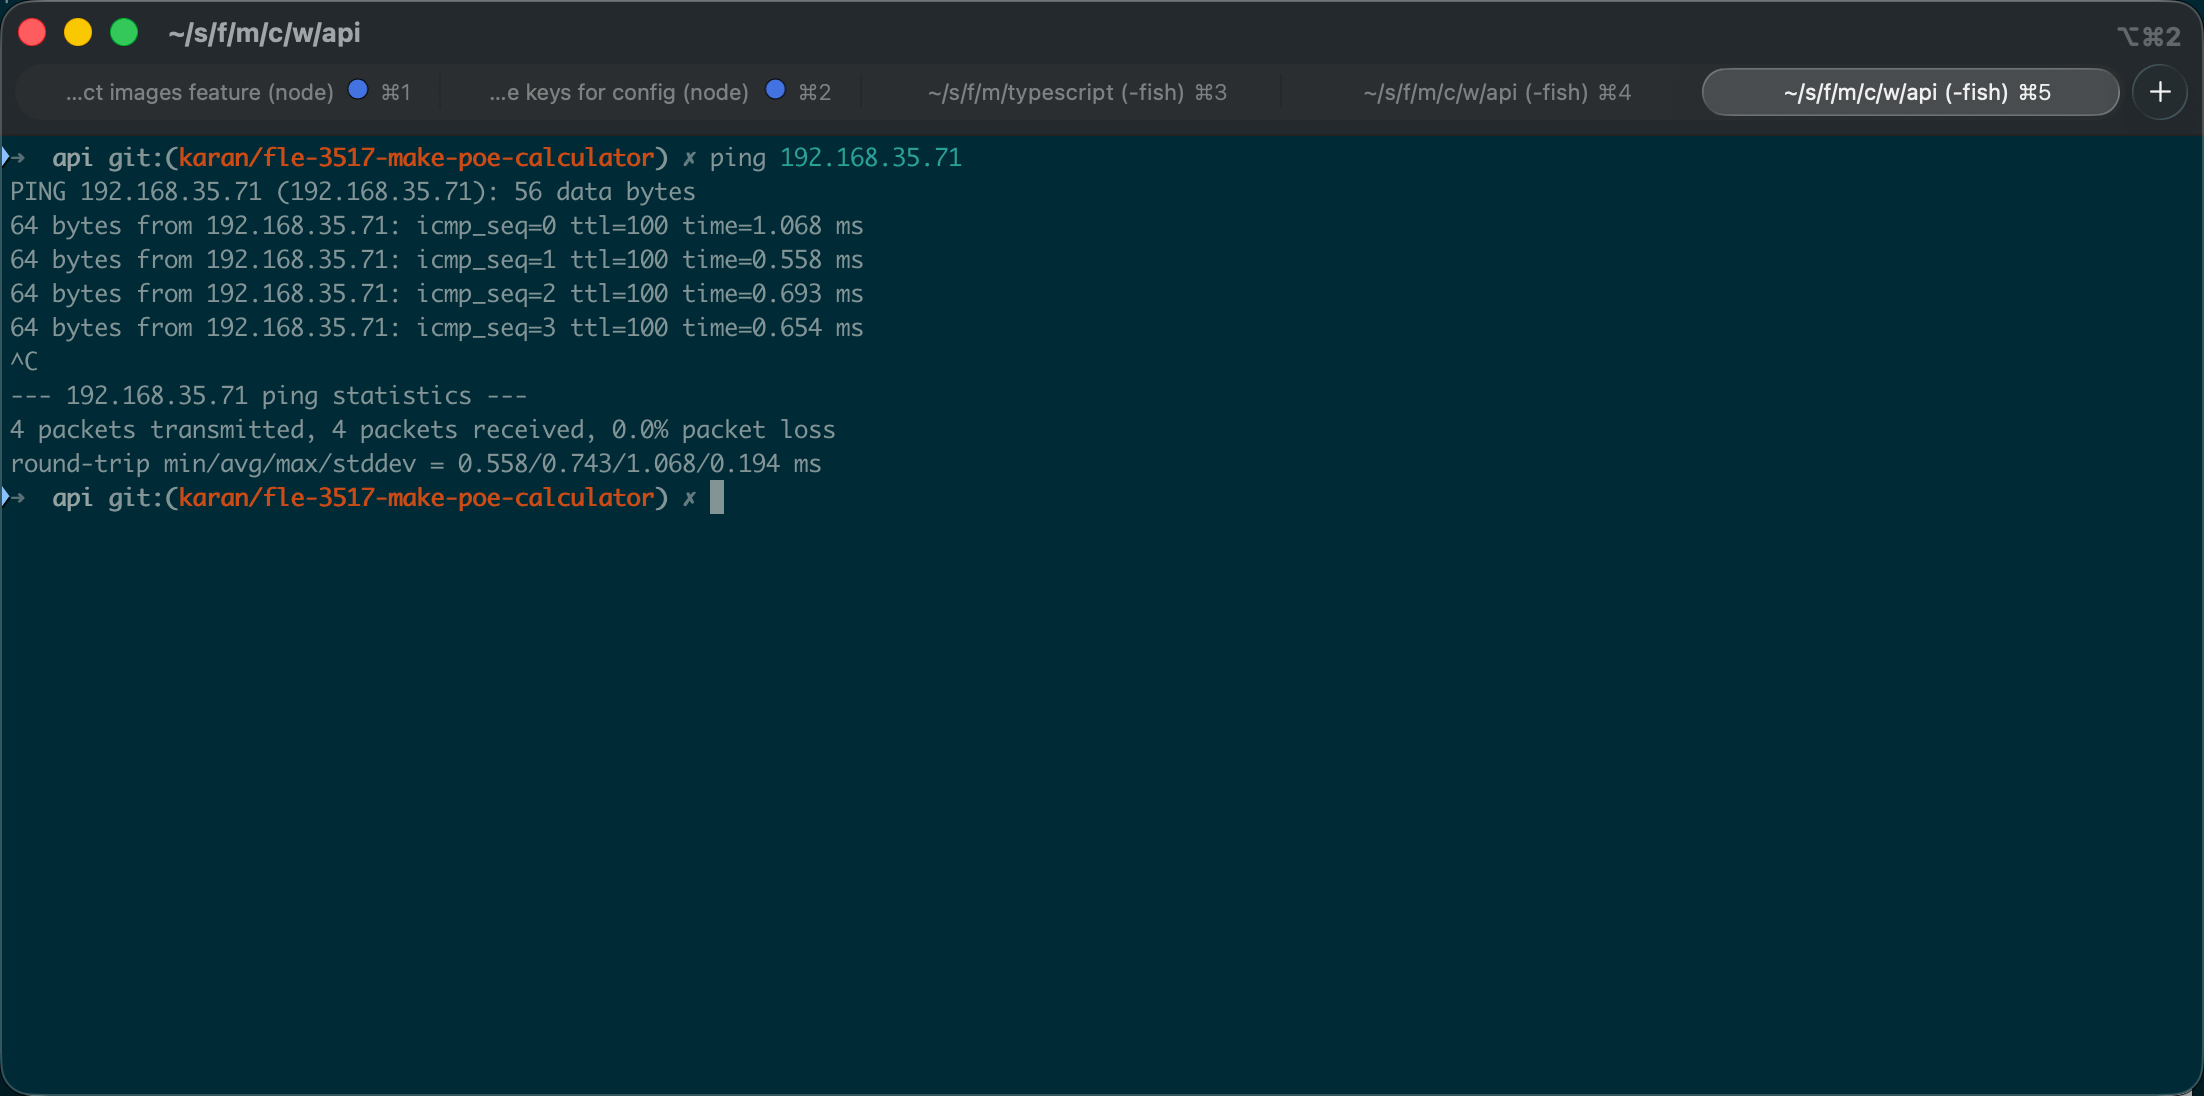
4
Update the gate's network configuration
In a web browser, navigate to the gate’s current IP address over 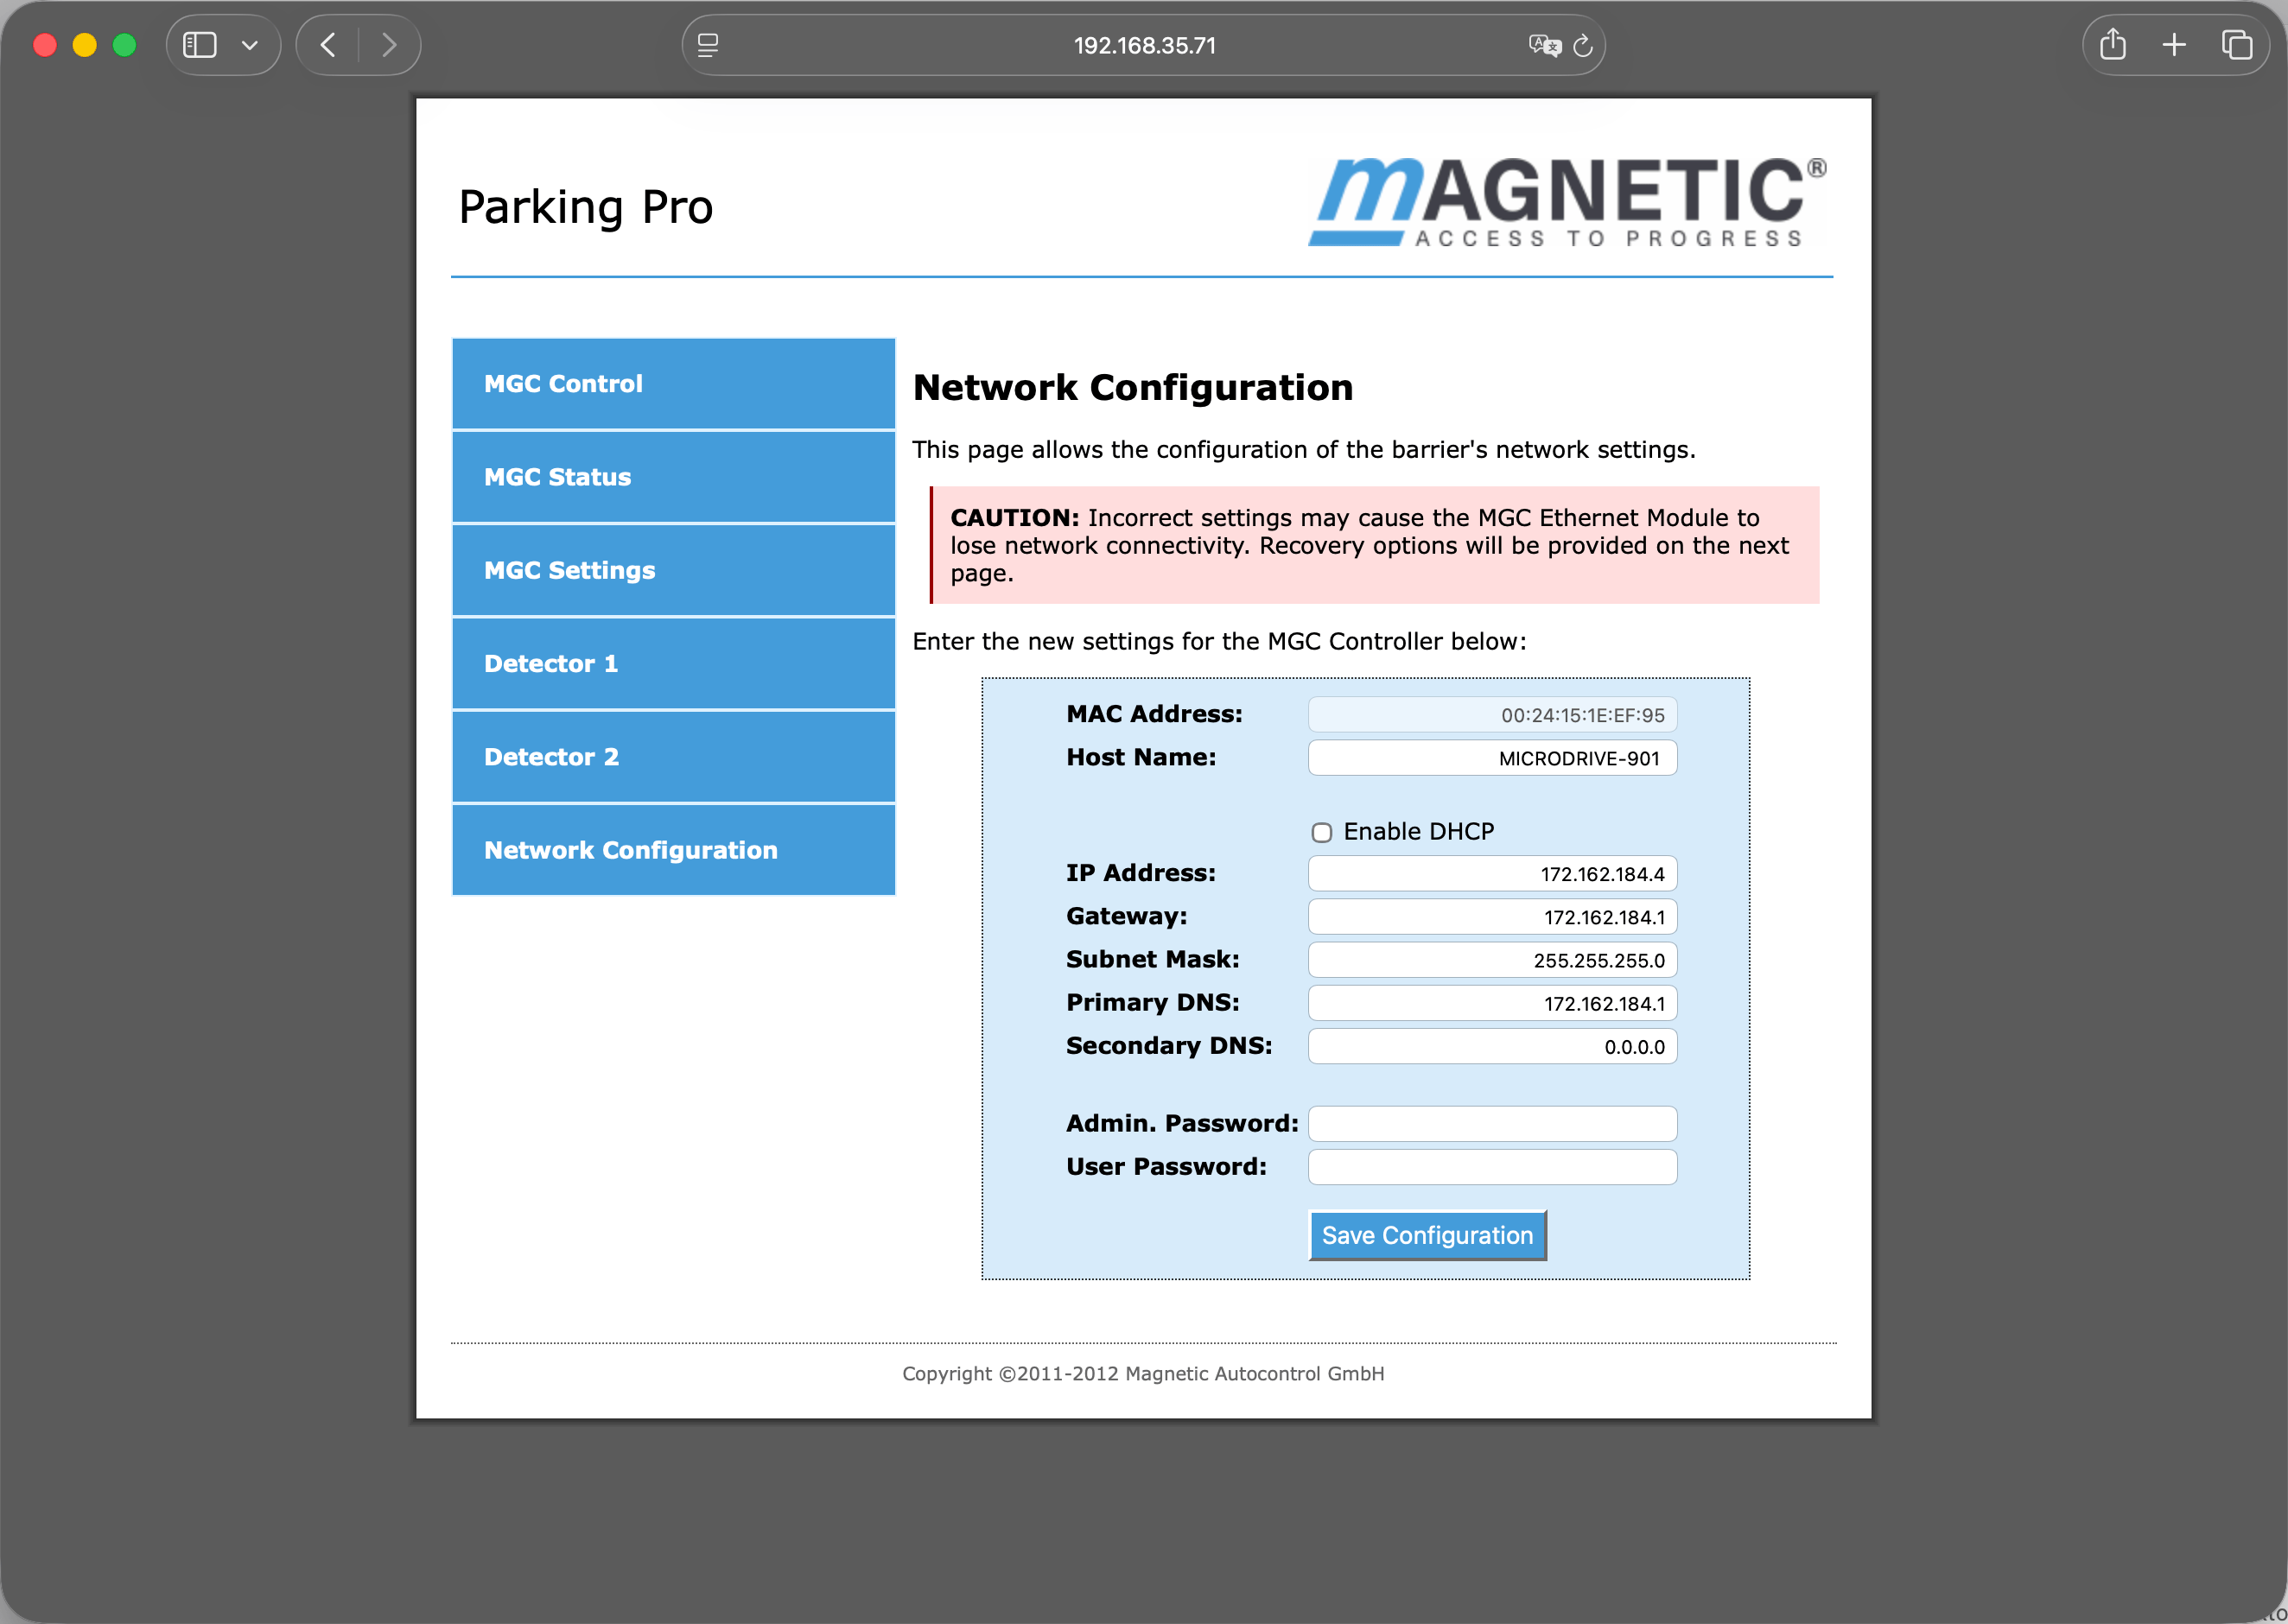
http (not https). Select “Network Configuration” and enter the new values. The exact IP address depends on the lane, so confirm it with FlexWash support before saving.5
Move the laptop to the FlexWash subnet
Update the laptop’s ethernet settings to match the new FlexWash subnet.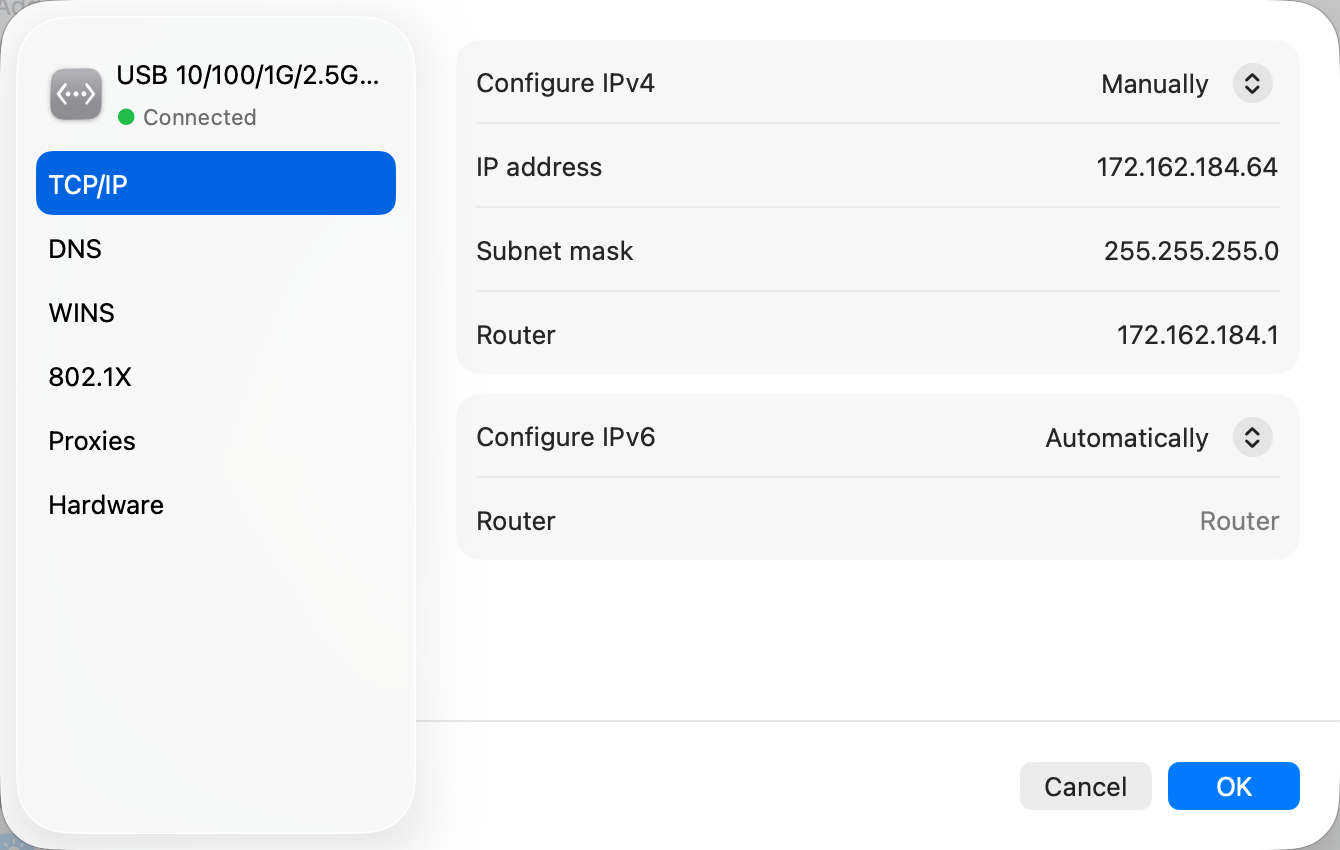
6
Verify the gate on its new address
The gate can take up to 5 minutes to apply the change and reboot. Once it finishes, the web interface loads on the new static IP address.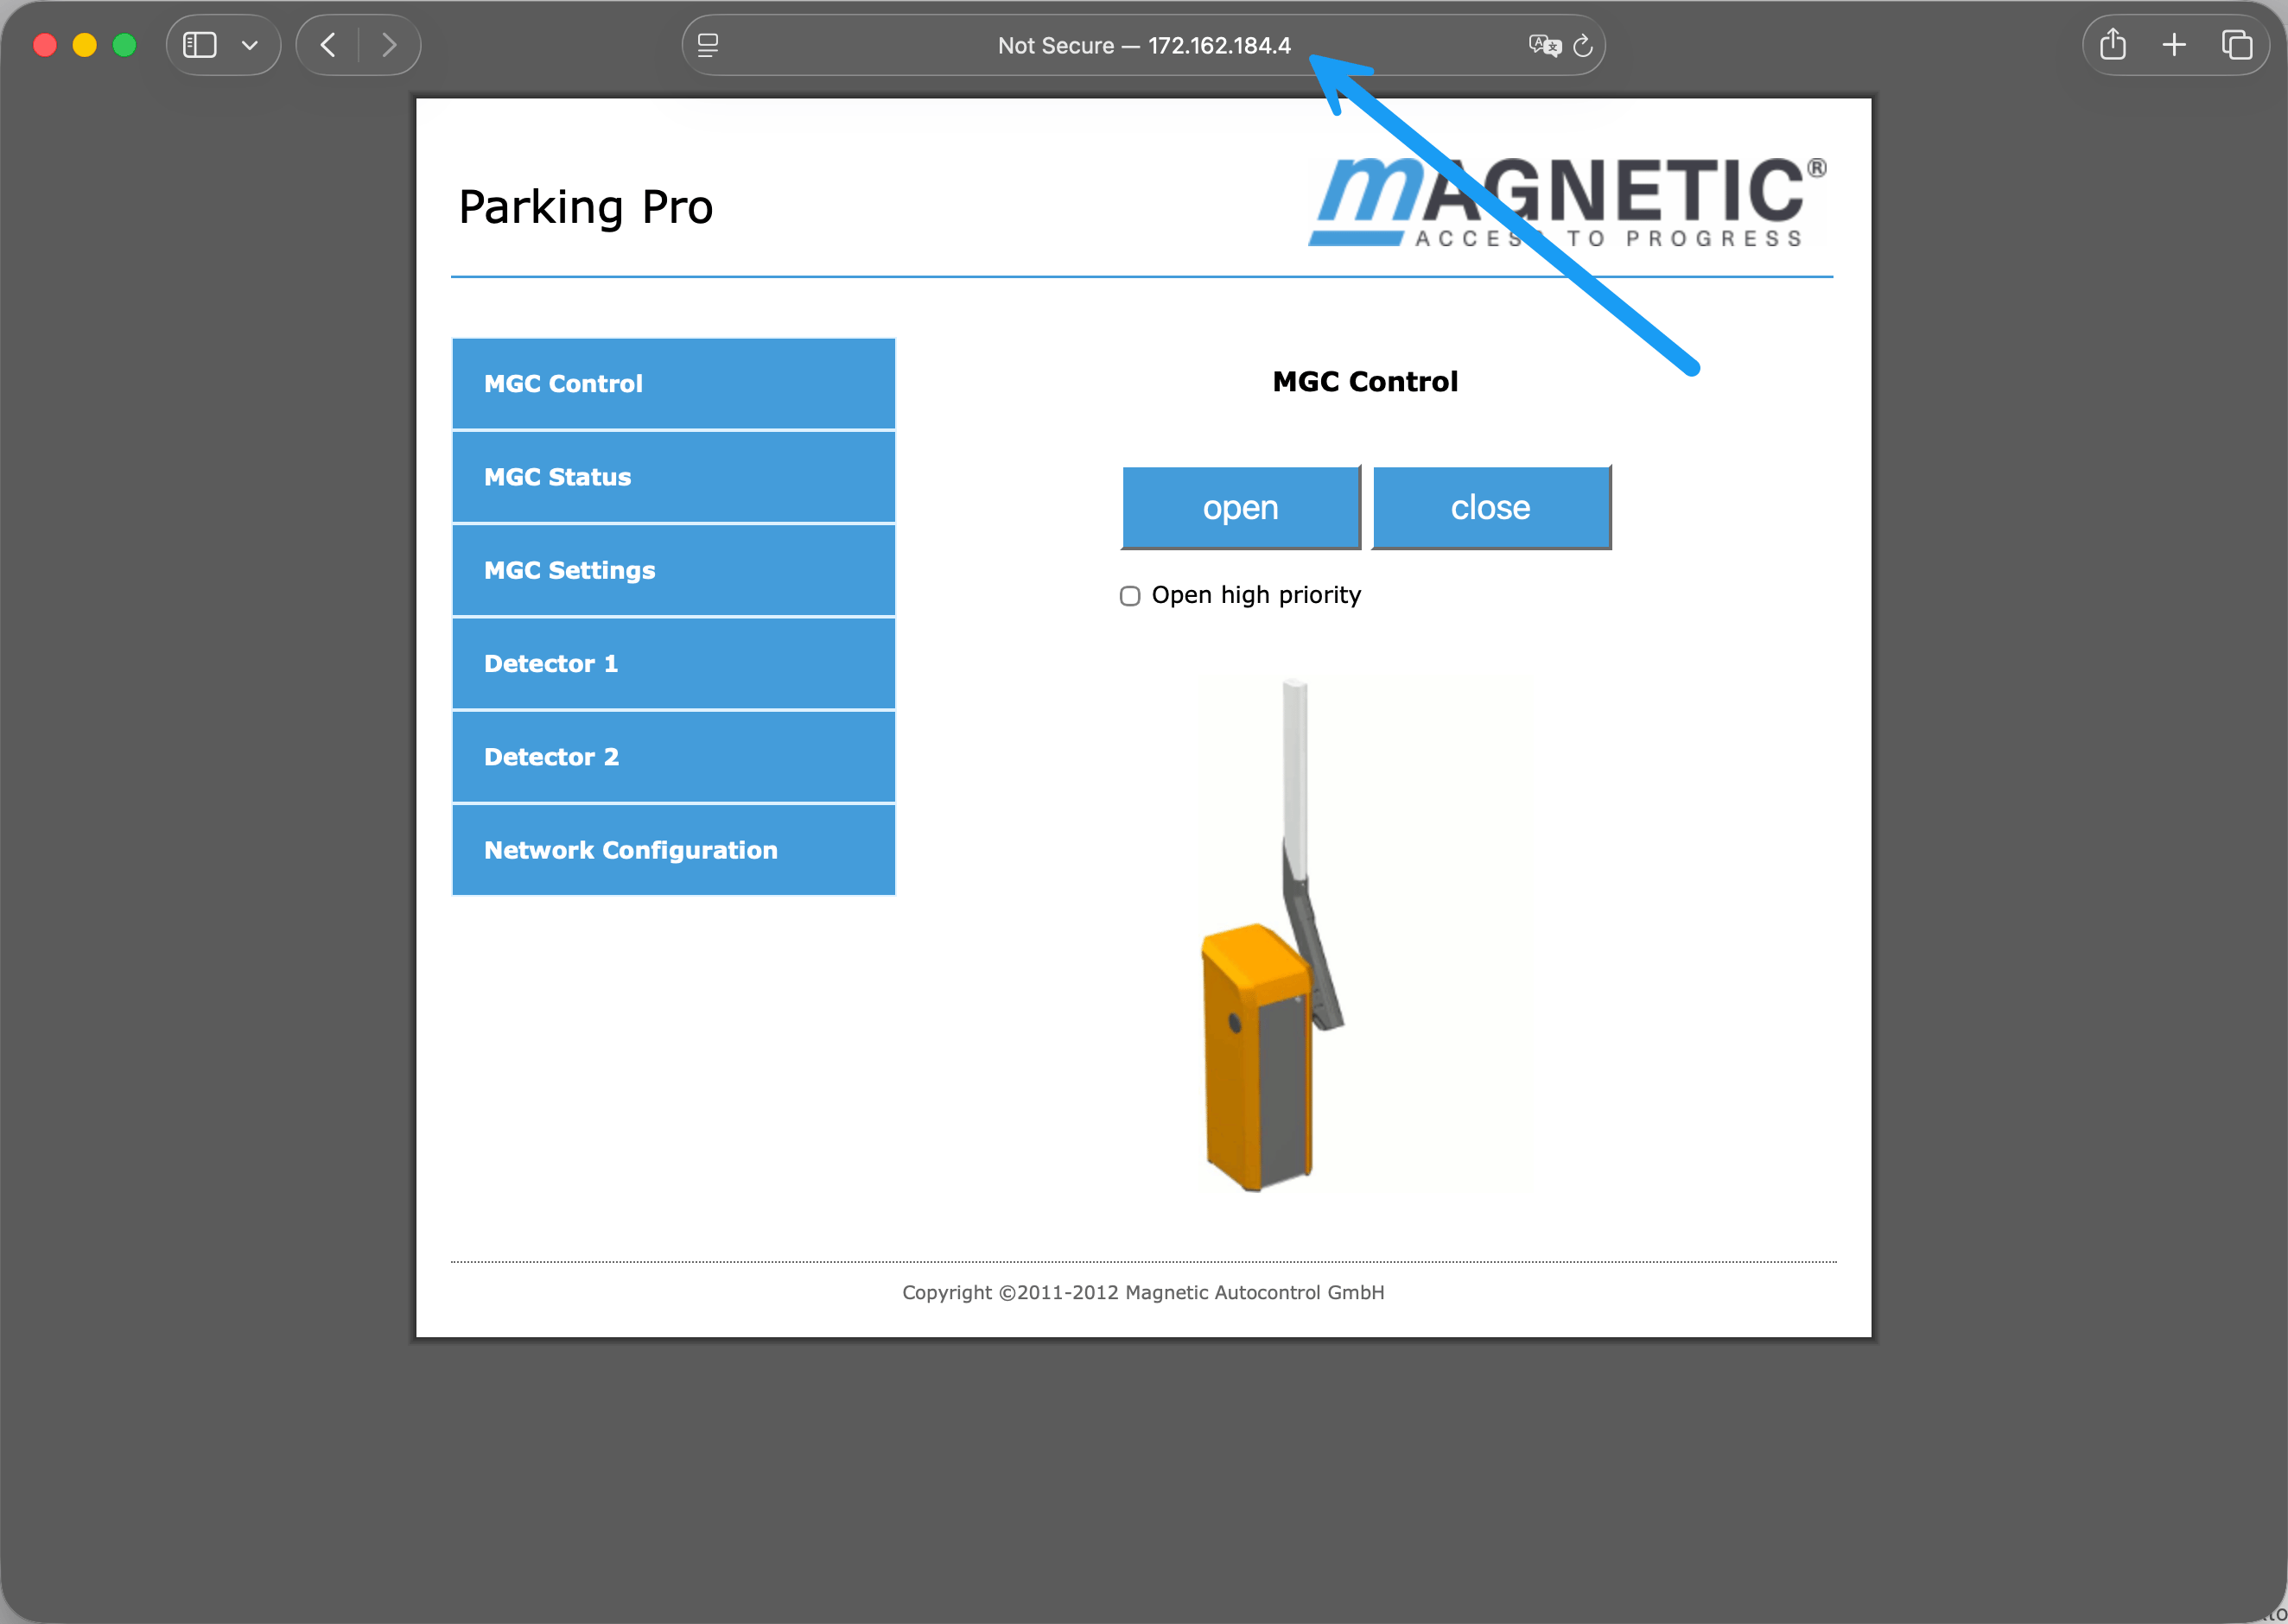
Ethernet Module

If your gate does not have an ethernet module, you will need to purchase one.
We recommend ordering directly from the
manufacturer.

Opening and closing the gate manually

- Switch the “Service” switch for the “Service” mode. The LED lights red. The display backlighting flashes.
- Perform one of the following functions:
- Push middle left button : Manually open the barrier.
- Push middle right button : Manually close the barrier.
- Switch “Service” switch. The LED must light green.
Turning the gates on and off
- Remove the barrier housing door.
- Switch on the barrier via the double pole mains switch.
- Depending on the settings in the “Start-up behaviour” menu, the barrier arm slowly moves into the top end position or stops.
- Mount the door.
- Attach and lock the hood.

Closing or opening the gate’s arm in case of power failure

- Remove the barrier housing hood.
- Remove the barrier housing door.
- Press a tool straight into appropriate tool bore. The lever arm is pressed from the dead point.
- Mount the door if applicable.
- Attach and lock the hood if applicable.