Why Use Roles
Granular Access
Choose from a wide range of individual permissions covering reports,
customer actions, menu configuration, FlexEngage, and more. Grant only
what each employee needs.
Reusable Templates
Define a role once and apply it to every user in that job function.
Update the role, and access changes for everyone assigned to it.
- A CSA role that allows viewing customers and washes, but not refunds or revenue reports.
- A Site Manager role that adds access to local performance reports and cash deposits.
- A Marketing role that unlocks FlexEngage tools and customer analytics without exposing financial data.
How Roles Work
FlexWash separates roles from the Admin role:- Admin is a built-in role with full access to every feature in your organization. Use it for owners and trusted operators.
- Custom roles are roles you create with a specific set of permissions. Apply one or more custom roles to any non-admin user.
Create a Role

Name the role
Enter a clear, descriptive name such as
CSA, Site Manager, or
Marketing Lead. Role names must be unique within your organization.Select permissions
Check the box next to each permission this role should grant. Permissions
are grouped by category, including Dashboards & Reports, Customer Actions,
Menu Configuration, and FlexEngage.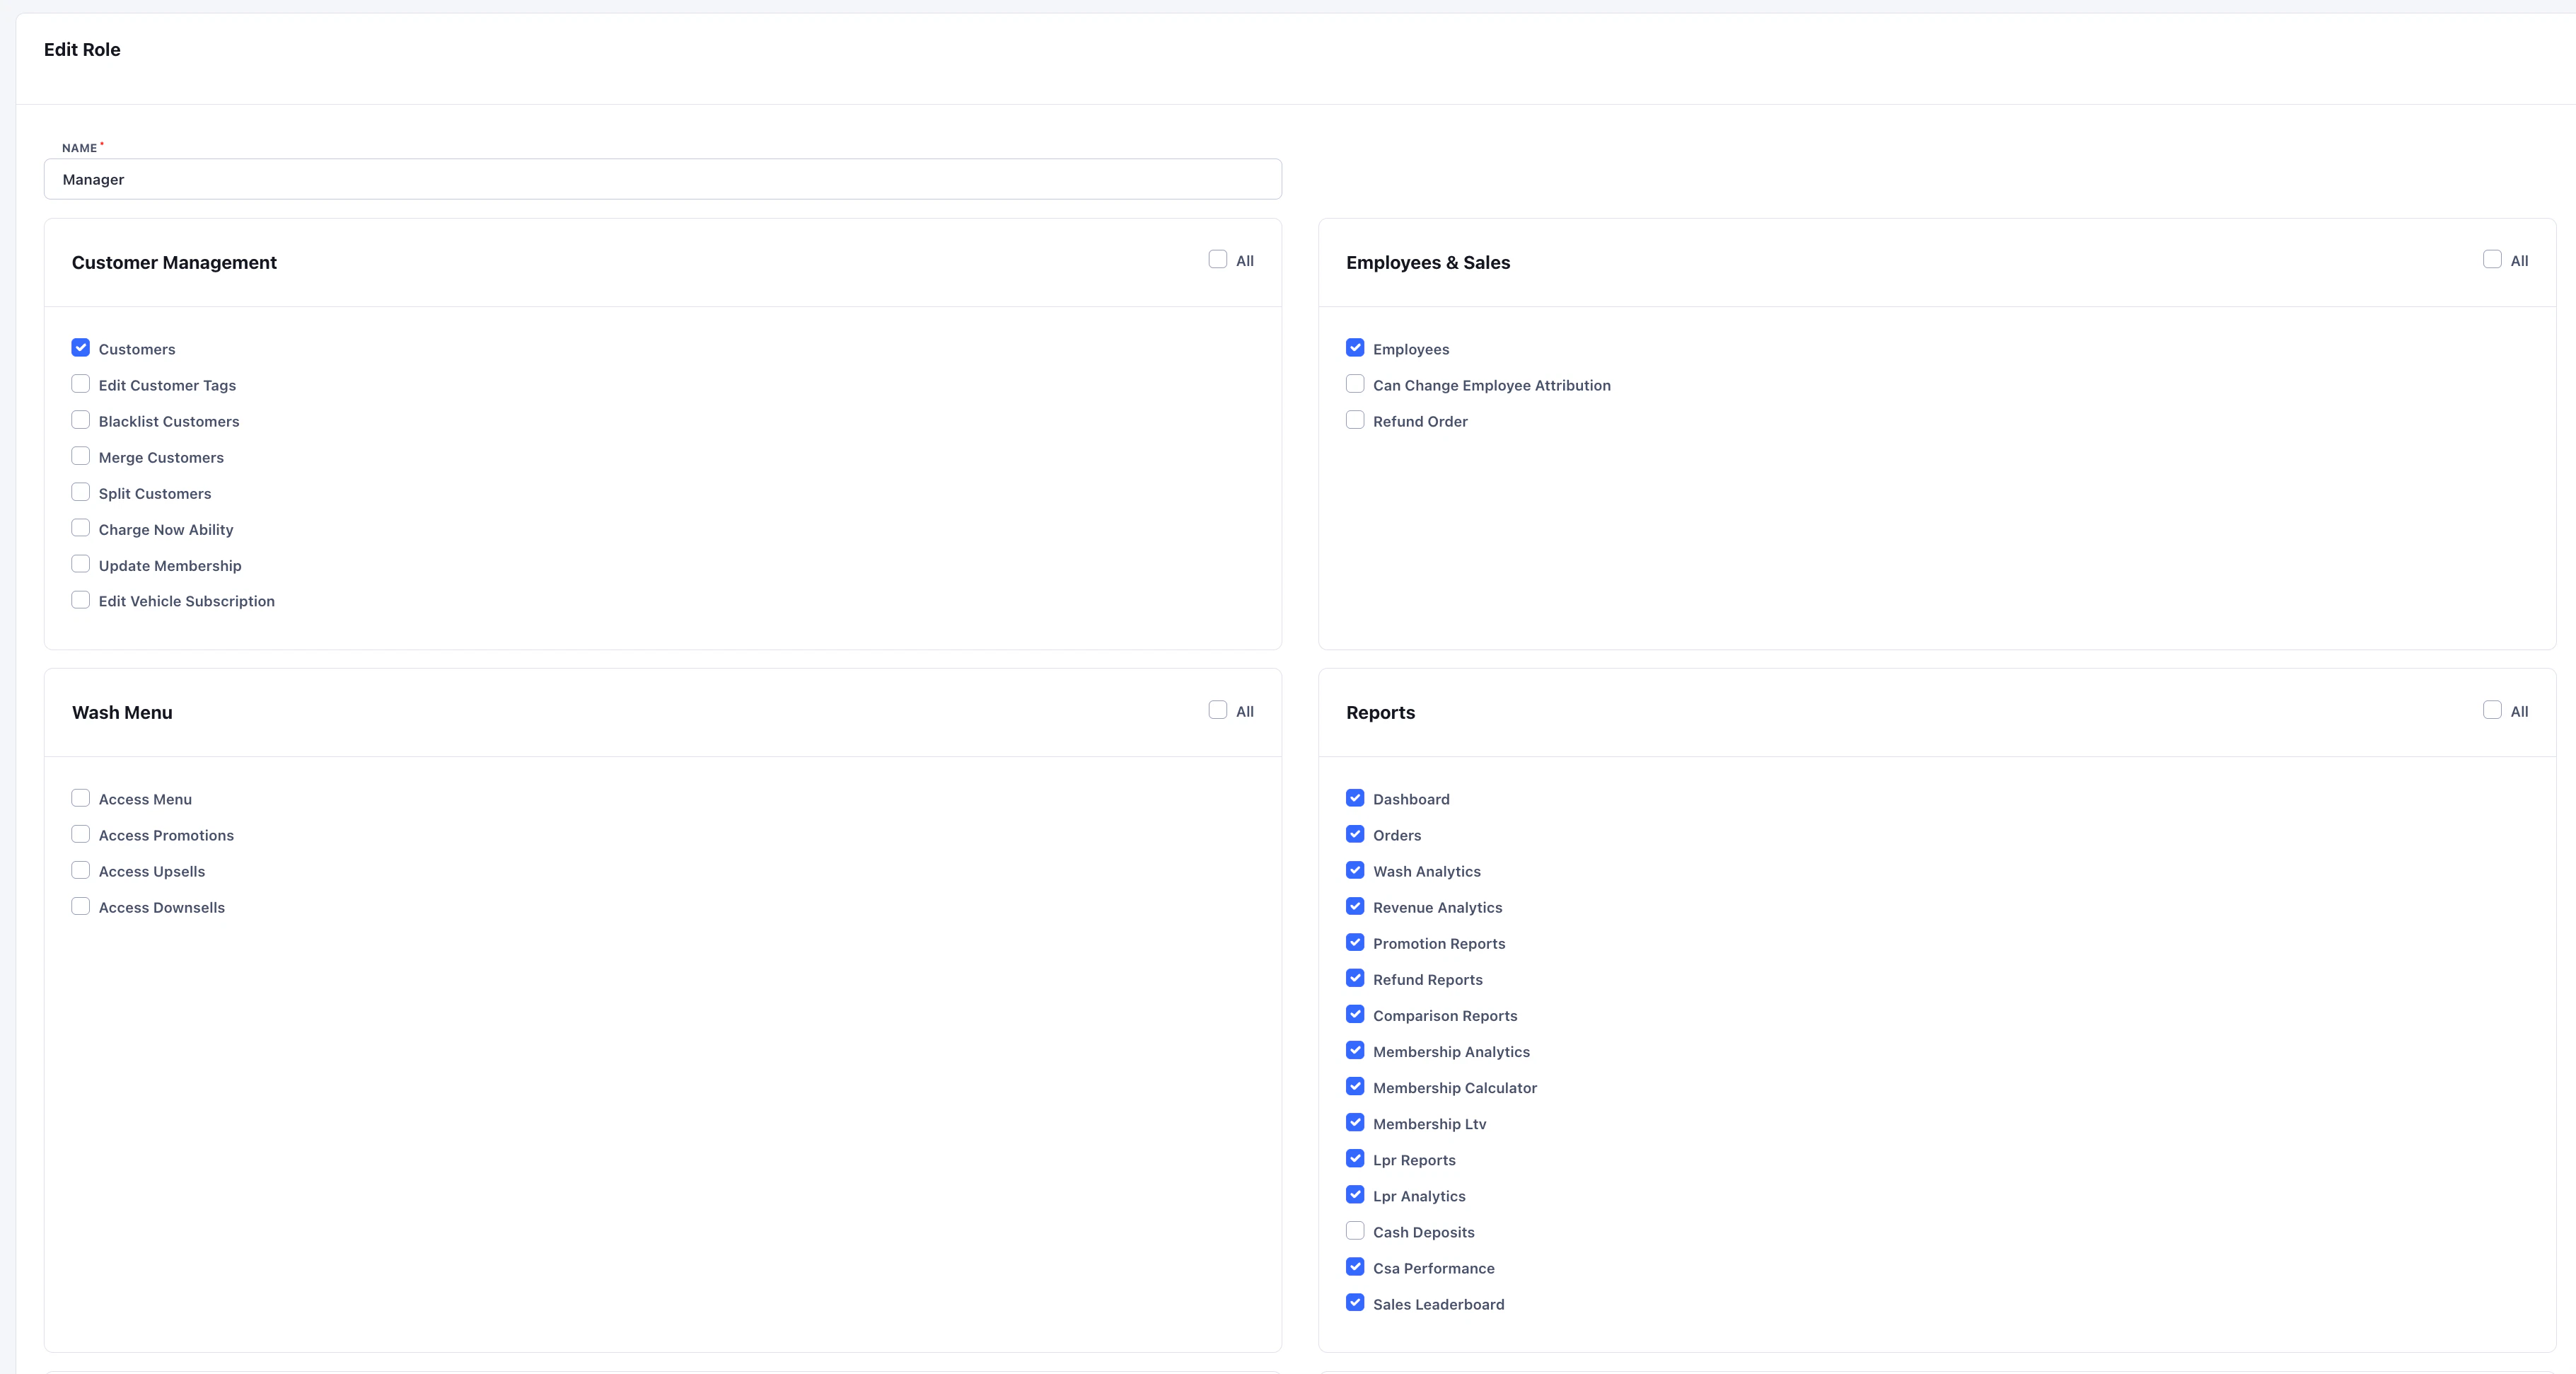
Edit or Delete a Role
Open Admin > Roles and click the role you want to change.- Edit: Update the name or adjust the permission set. Changes apply to every user assigned to the role on their next sign-in.
- Delete: Roles can only be deleted if no active users are assigned to them. Reassign affected users first, then delete.