> ## Documentation Index
> Fetch the complete documentation index at: https://docs.flexwash.com/llms.txt
> Use this file to discover all available pages before exploring further.
# Network
> Step by step guide for setting up FlexWash POS on-prem
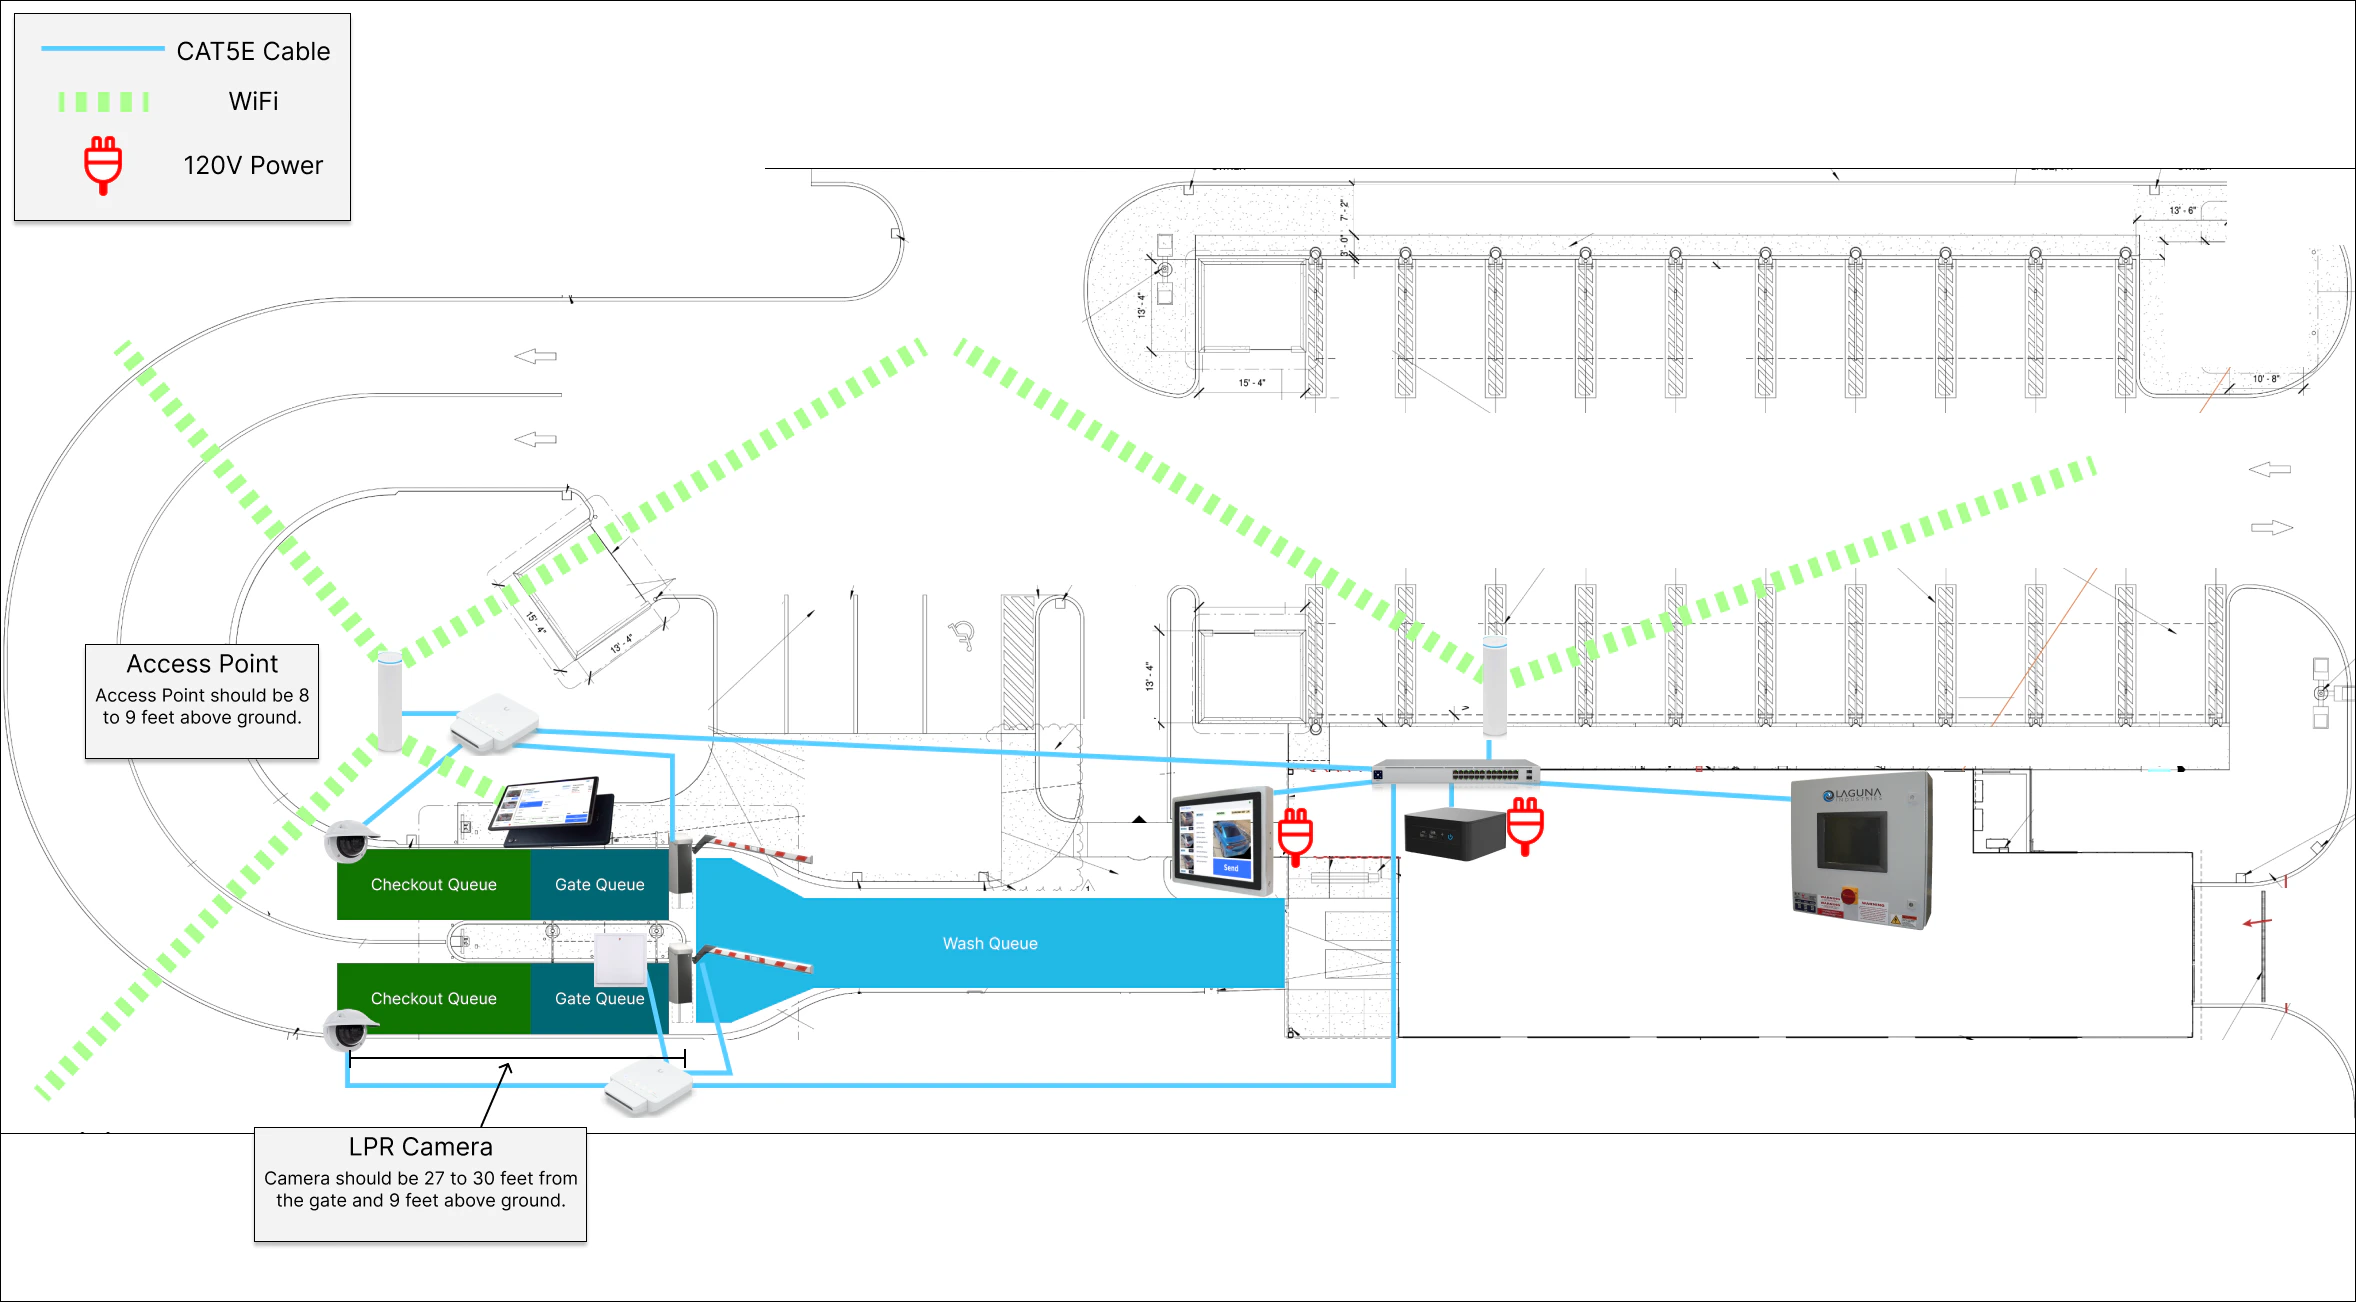
FlexWash network topology looks like this.
.png?fit=max&auto=format&n=6hMZq2UCxwjzXtNc&q=85&s=9a77c1d5d64dccebd8c43cae5a619851) This topology is typically installed like this but the specifics can vary site to site.
This topology is typically installed like this but the specifics can vary site to site.
 ### Ethernet Cables
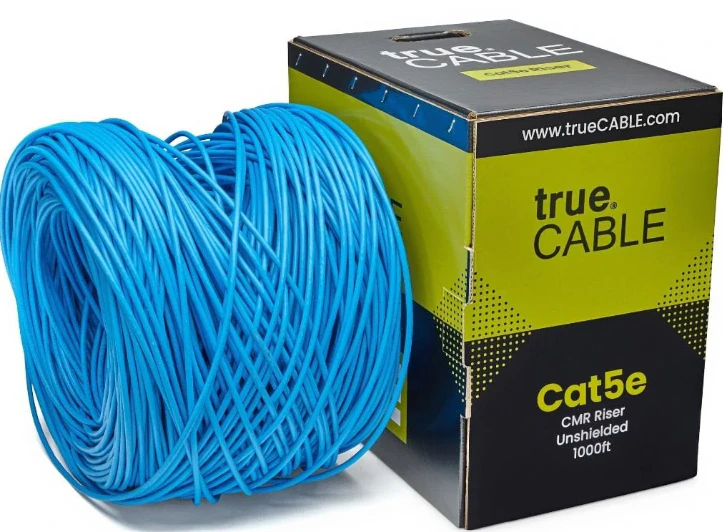 At minimum we require **CAT5E** cables for all our peripherals. This cable will work with both auxiliary power and PoE (Power over Ethernet) devices. Other cables like **CAT6** and **CAT6A** will work as long as they are compatible with \*\*CAT5E \*\*standards.\
\
Replacing bad cables is laborious and difficult. We strongly recommend you use a high quality cable from a reputable brand. We've had good experience with [TrueCable](https://www.truecable.com/products/cat5e-riser-ethernet-cable-unshielded-1000ft). Avoid running these cables in the same conduit you have high voltage as that will cause interference.
## Office Equipment
Everything in this section is meant to all be installed in one climate controlled and dry place, typically an office. These devices are NOT outdoor or extreme temperature rated.
We recommend this be done in a server rack or cupboard to prevent someone from accidentally messing with your FlexWash installation.
### 1. Power Supply
First setup the power supply. Make sure the battery terminals are connected before you plug in FlexWash equipment.
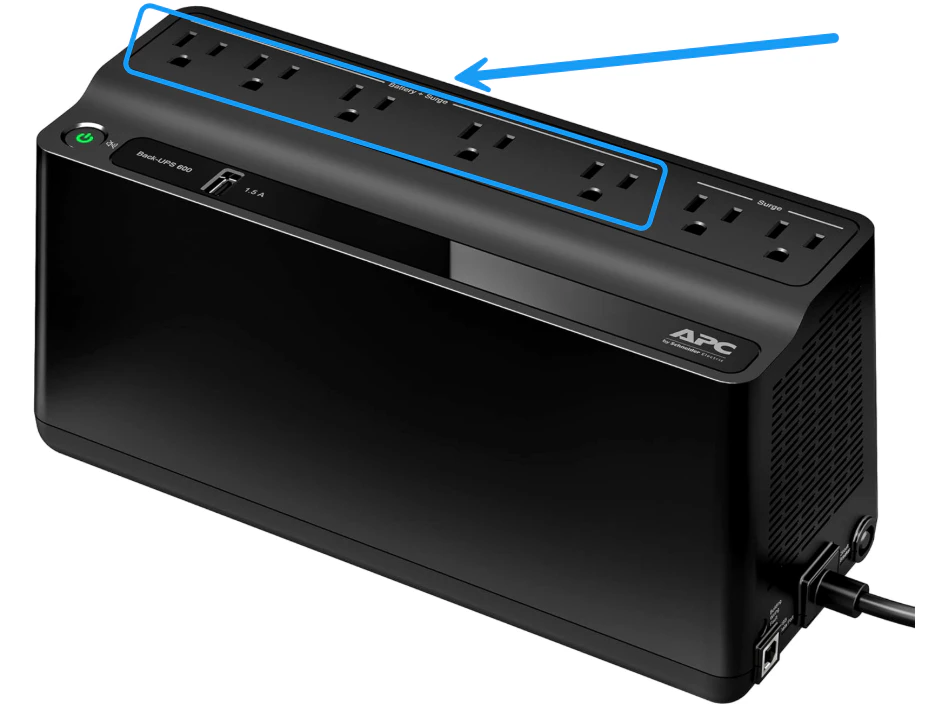
All FlexWash equipment must be plugged into the ports labeled Battery + Surge as shown on the image below:
At minimum we require **CAT5E** cables for all our peripherals. This cable will work with both auxiliary power and PoE (Power over Ethernet) devices. Other cables like **CAT6** and **CAT6A** will work as long as they are compatible with \*\*CAT5E \*\*standards.\
\
Replacing bad cables is laborious and difficult. We strongly recommend you use a high quality cable from a reputable brand. We've had good experience with [TrueCable](https://www.truecable.com/products/cat5e-riser-ethernet-cable-unshielded-1000ft). Avoid running these cables in the same conduit you have high voltage as that will cause interference.
## Office Equipment
Everything in this section is meant to all be installed in one climate controlled and dry place, typically an office. These devices are NOT outdoor or extreme temperature rated.
We recommend this be done in a server rack or cupboard to prevent someone from accidentally messing with your FlexWash installation.
### 1. Power Supply
First setup the power supply. Make sure the battery terminals are connected before you plug in FlexWash equipment.
All FlexWash equipment must be plugged into the ports labeled Battery + Surge as shown on the image below:
 Next we will power on the coordinator and switch.
### 2. Coordinator
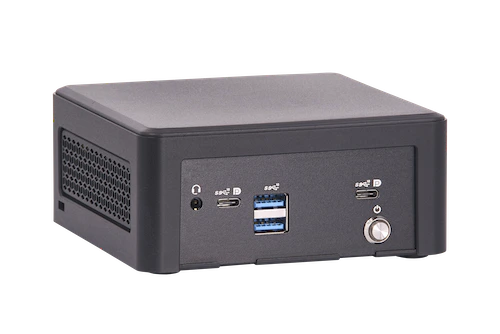
The coordinator looks like this.
Next we will power on the coordinator and switch.
### 2. Coordinator
The coordinator looks like this.
 Connect the coordinator to the power supply we setup earlier, then push the power button and wait for the power light to turn on.
### 3. Switch
The switch looks like this.
Connect the coordinator to the power supply we setup earlier, then push the power button and wait for the power light to turn on.
### 3. Switch
The switch looks like this.
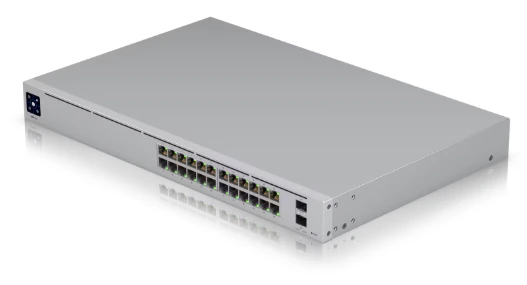 Plug this switch into the power supply we setup earlier. It should boot up automatically.
### 4. Connect Office Devices
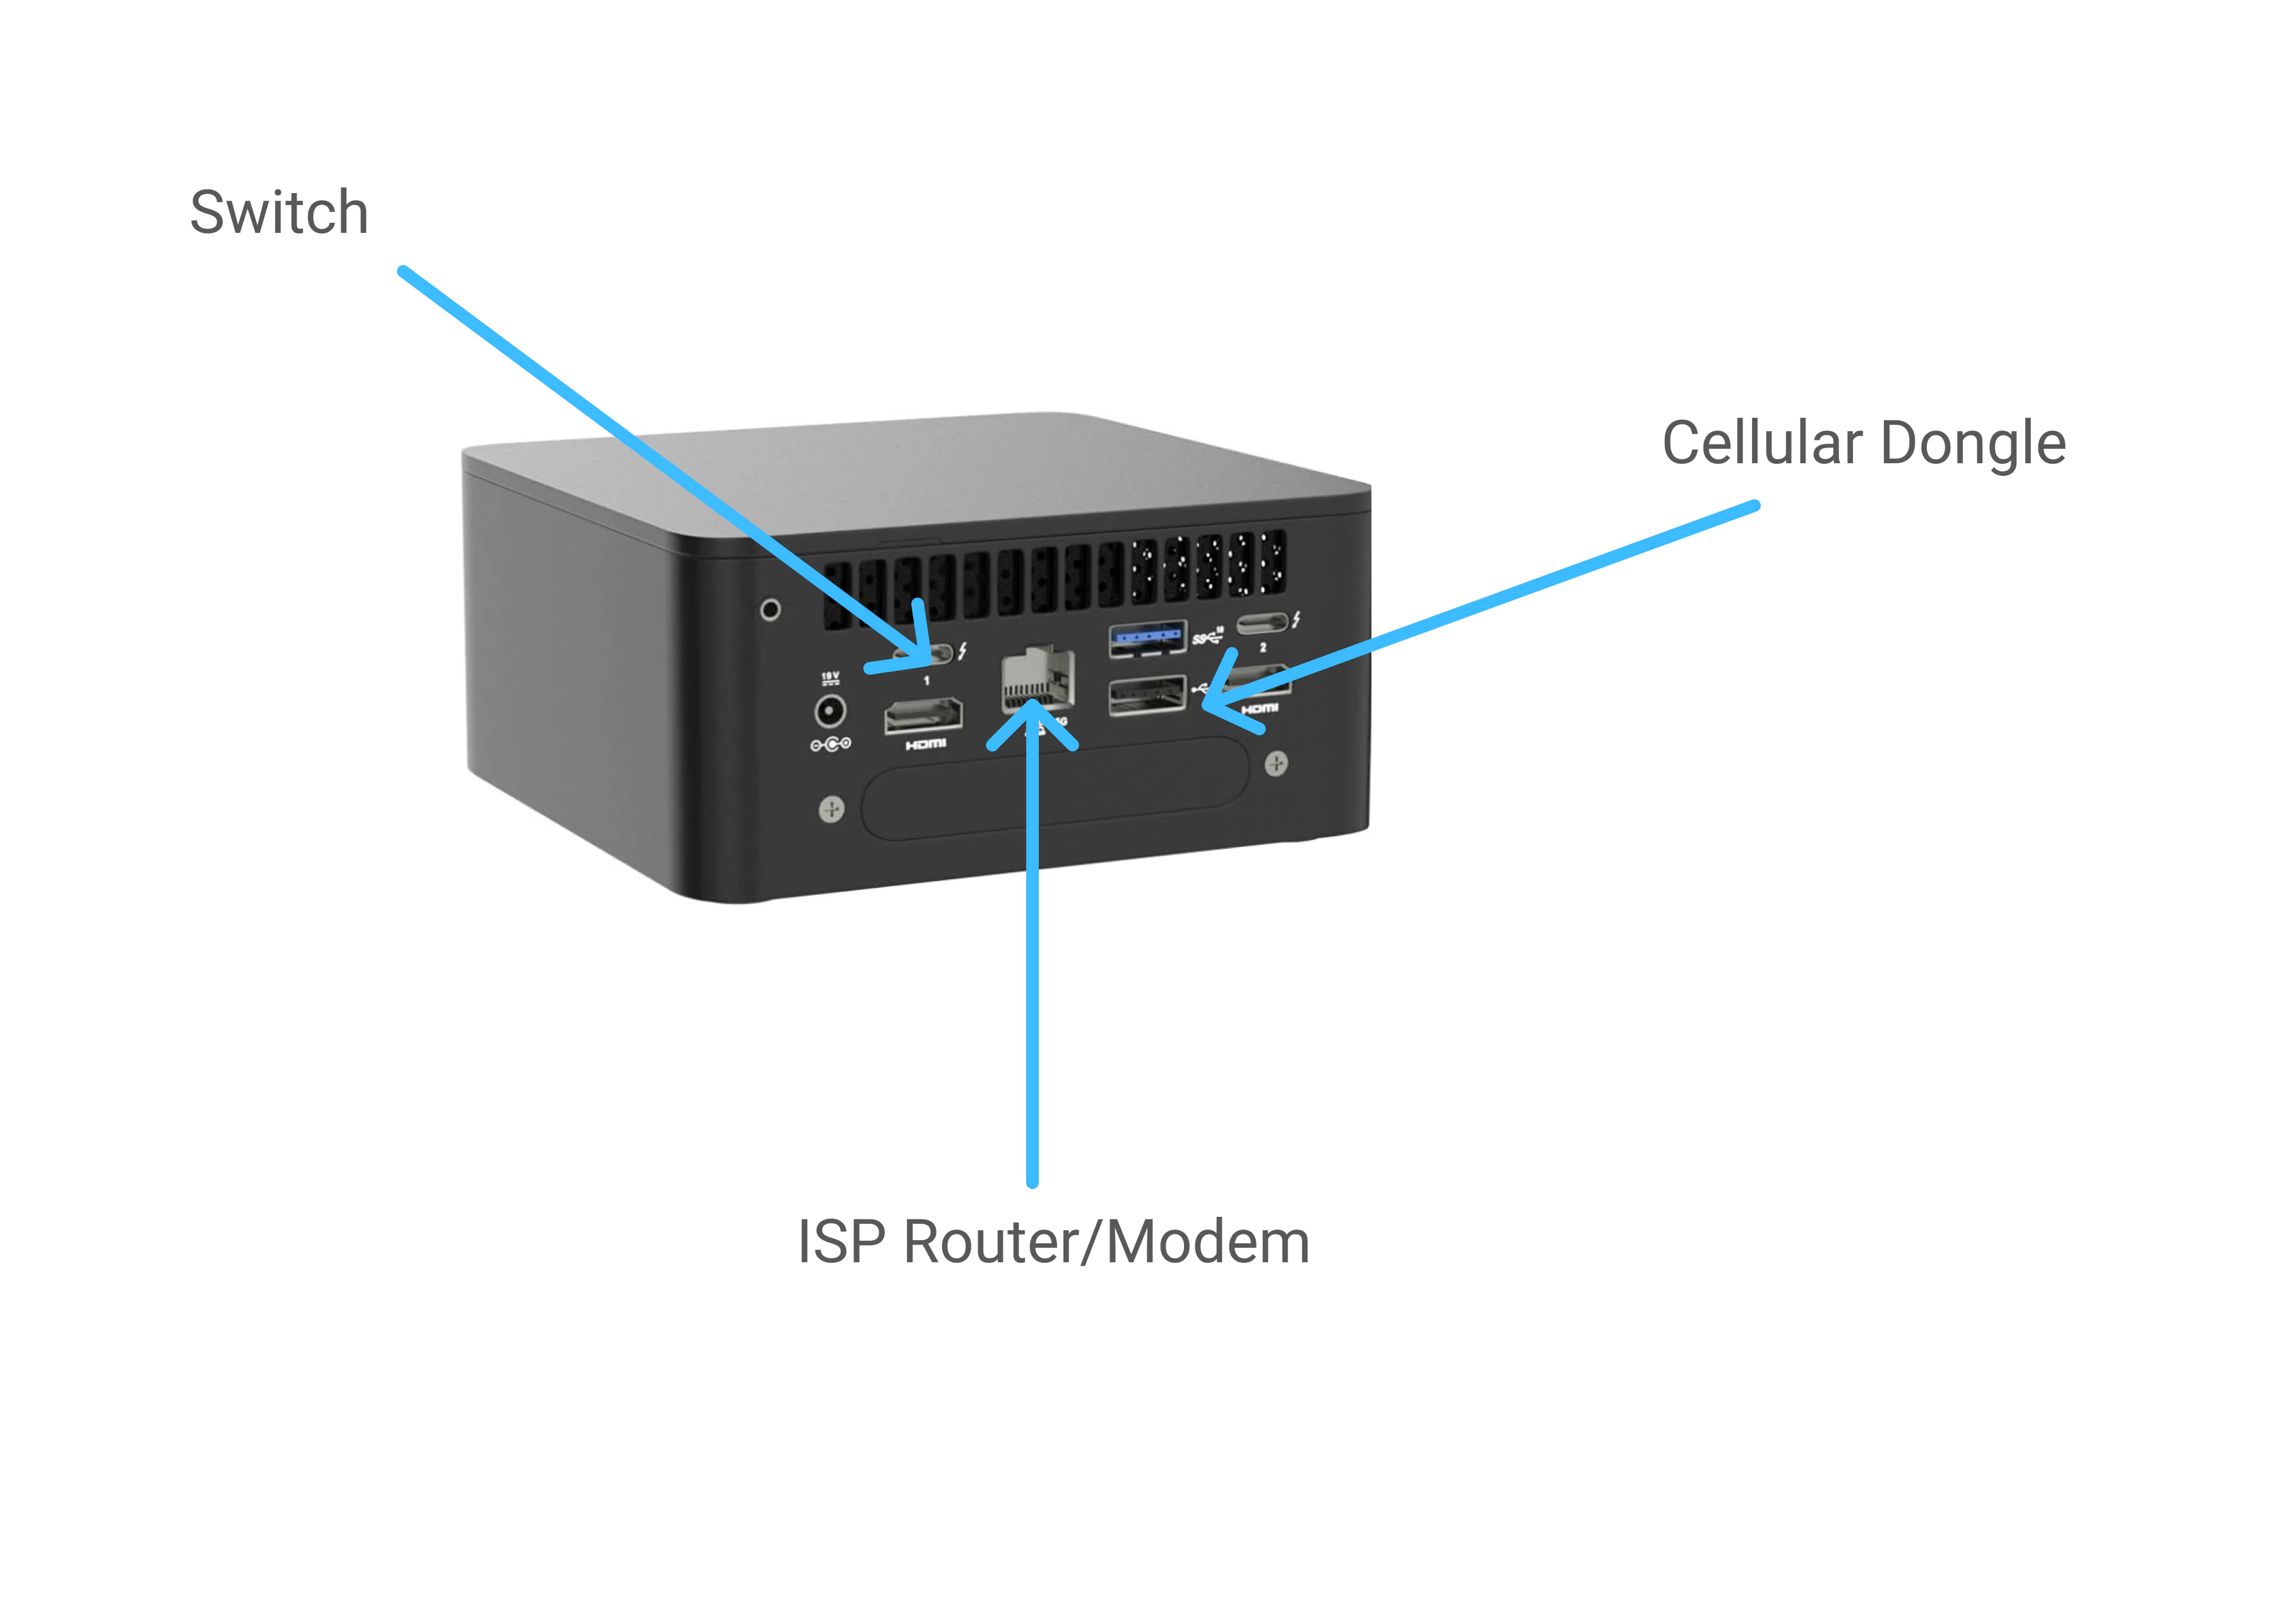
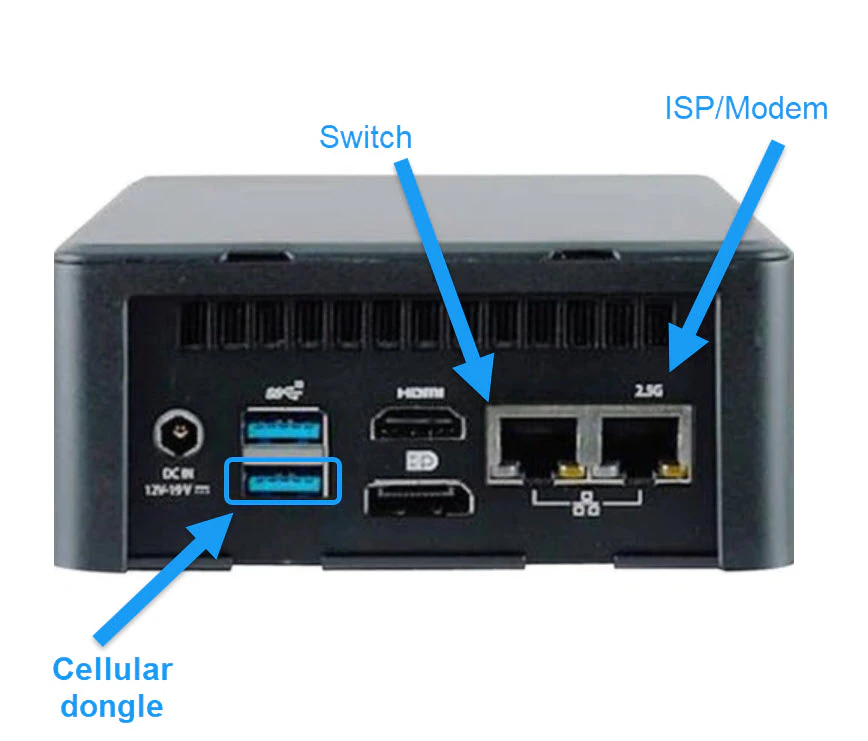
Depending on the model, the coordinator must be wired according to these specs:
Plug this switch into the power supply we setup earlier. It should boot up automatically.
### 4. Connect Office Devices
Depending on the model, the coordinator must be wired according to these specs:
 #### a. ISP Router/Modem
This connection is for internet access. Plug an ethernet cable from your router or modem to the coordinator.
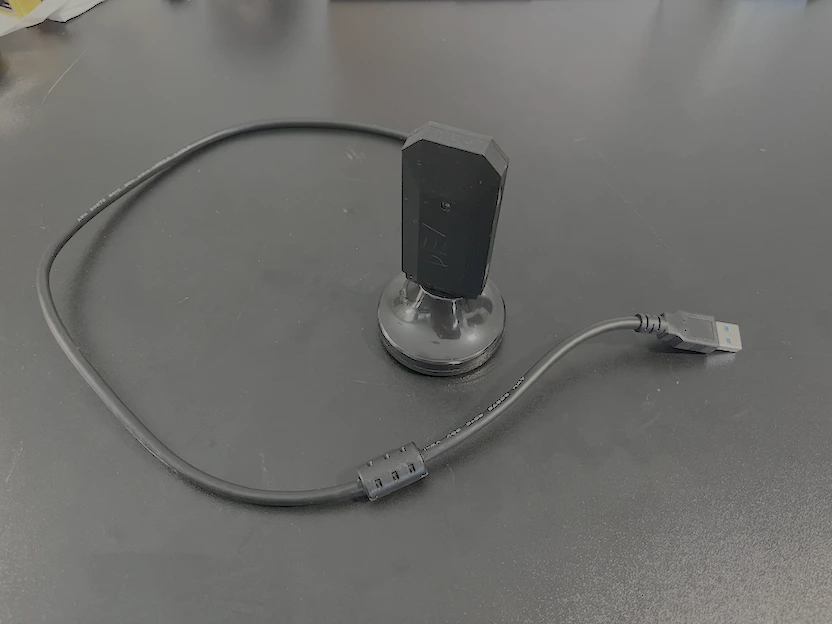
#### b. Cellular Dongle
Plug the dongle into the adapter and the adapter into the coordinator. This is for limited backup internet in case of a network outage. See [cellular failover
docs](/technical/hardware/cellular-failover) for more details.
#### a. ISP Router/Modem
This connection is for internet access. Plug an ethernet cable from your router or modem to the coordinator.
#### b. Cellular Dongle
Plug the dongle into the adapter and the adapter into the coordinator. This is for limited backup internet in case of a network outage. See [cellular failover
docs](/technical/hardware/cellular-failover) for more details.
 #### c. Switch
Plug a CAT5/CAT6 cable from the coordinator to port 1 on the switch. Always leave port 2 empty.
#### c. Switch
Plug a CAT5/CAT6 cable from the coordinator to port 1 on the switch. Always leave port 2 empty.
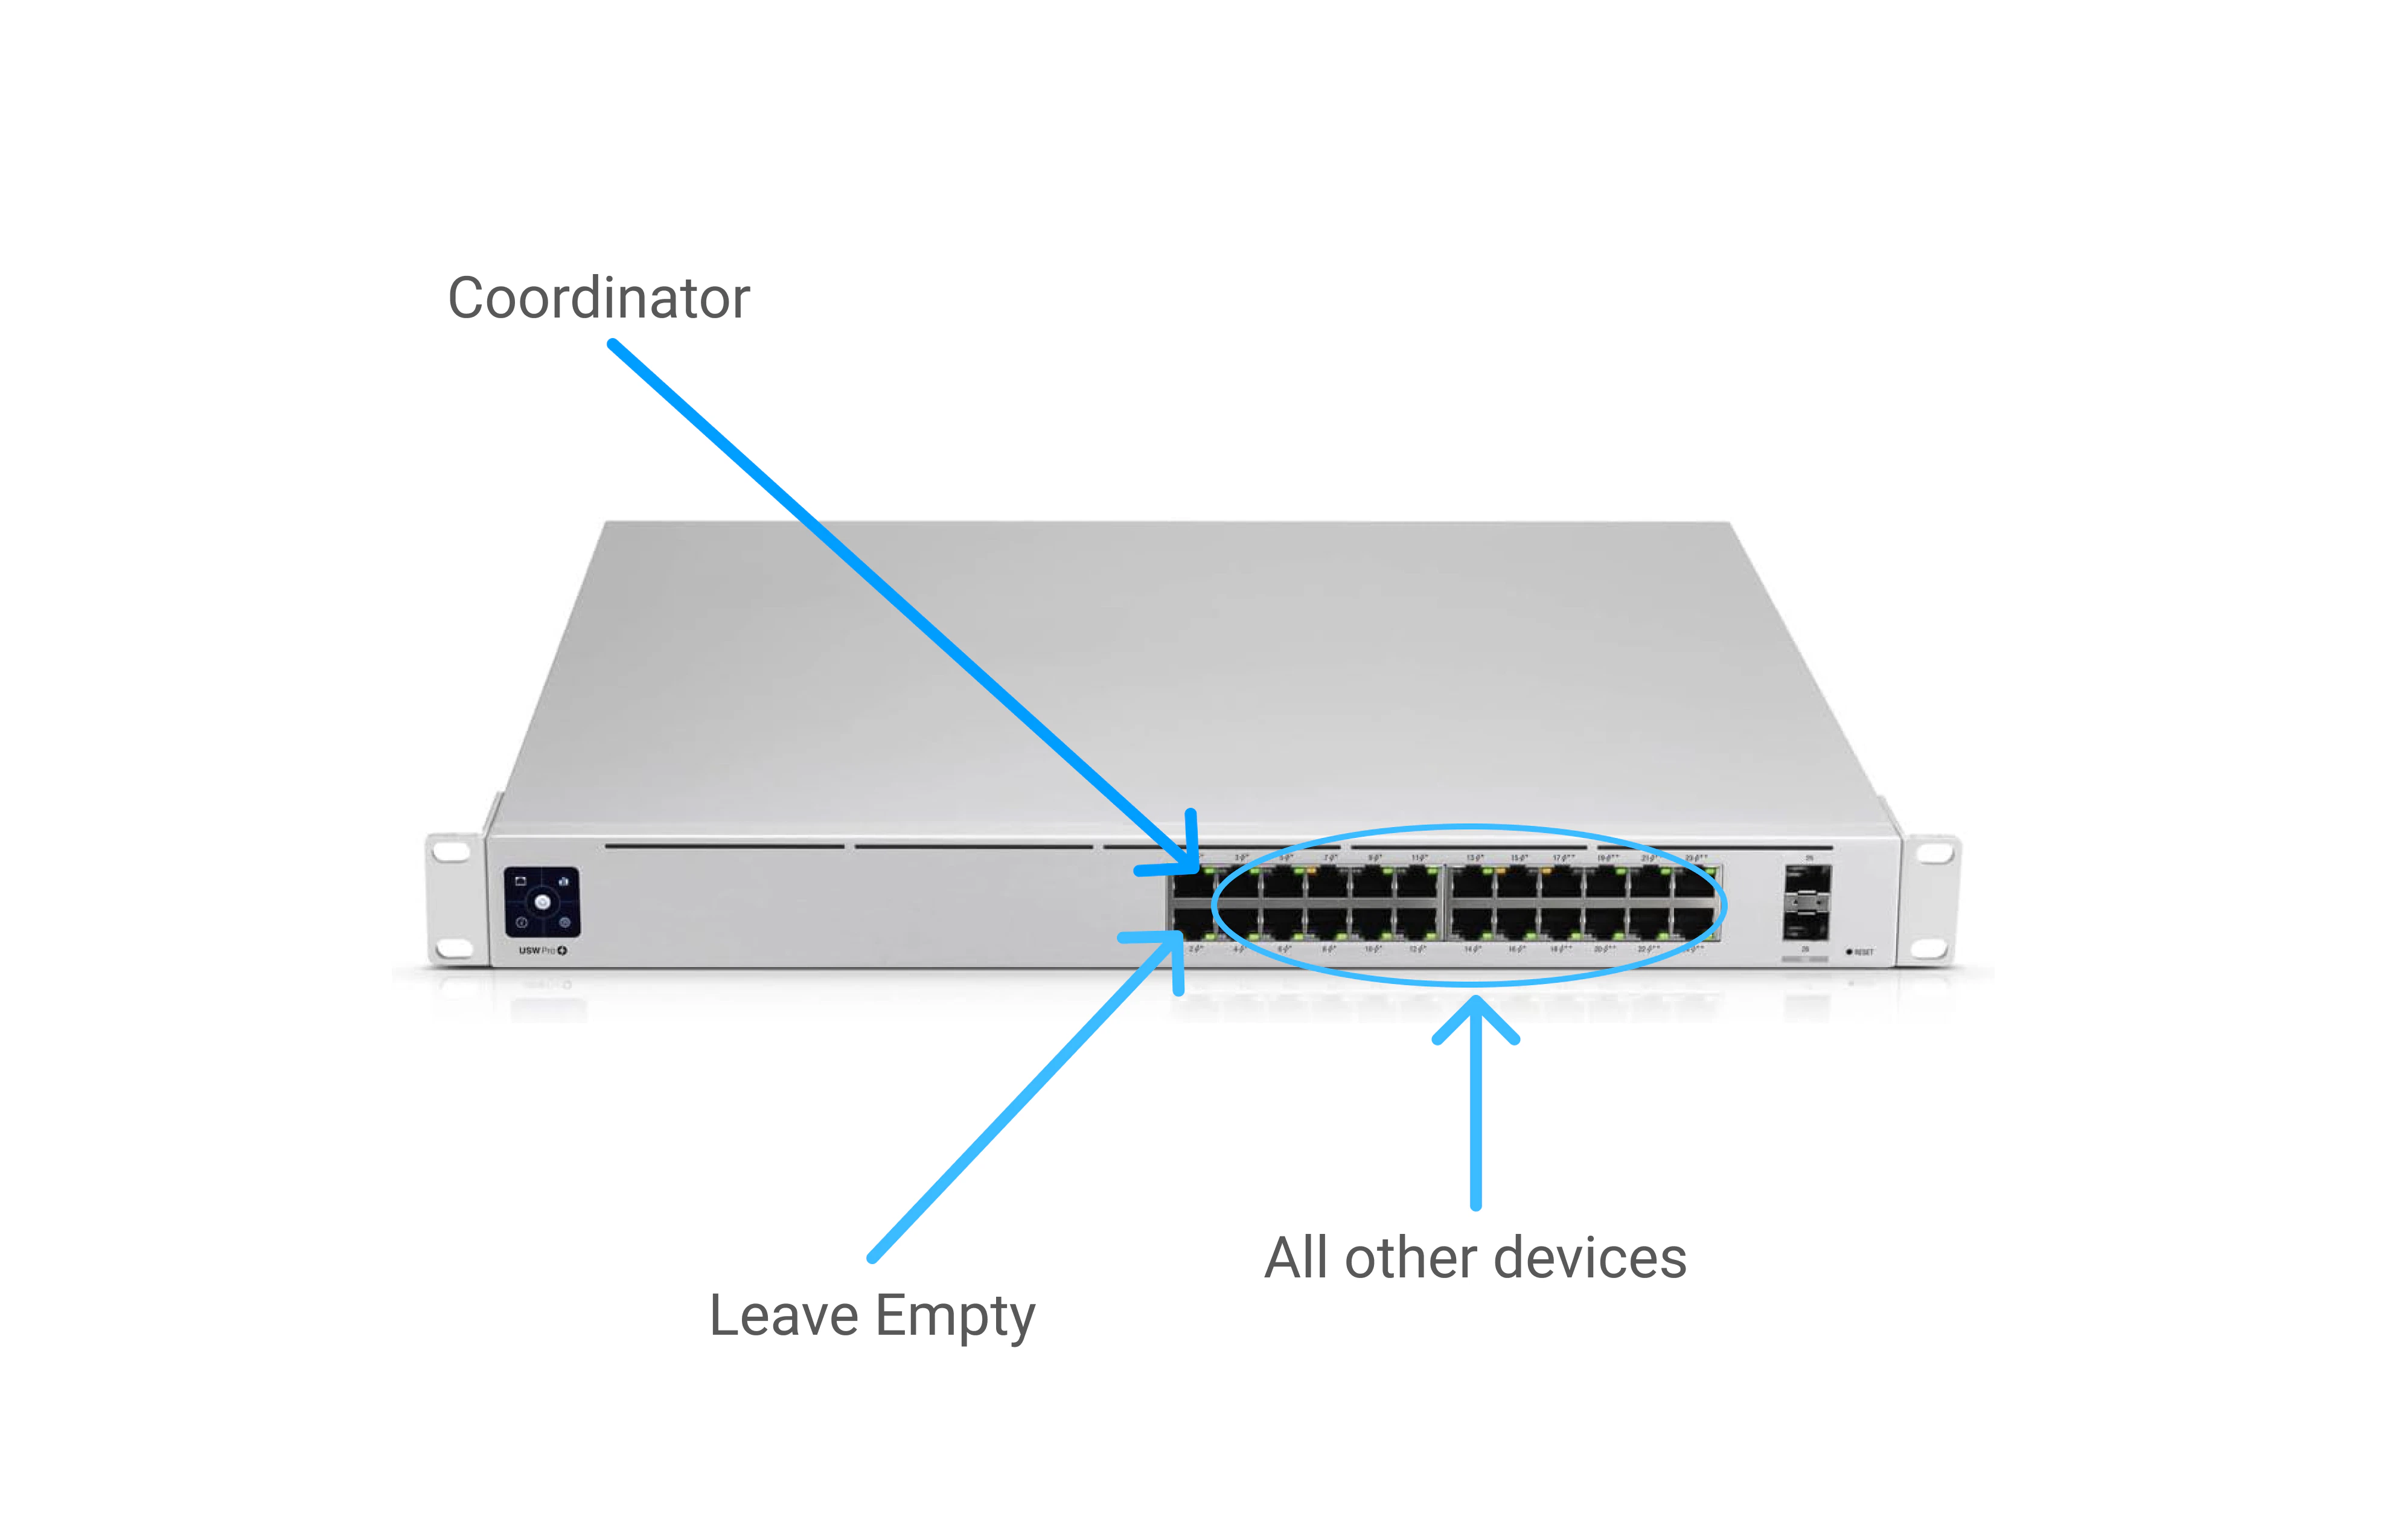 Make sure unused ports are covered with the provided dust protectors to prevent damage.
## Connect Peripherals
Peripherals are devices that connect to the network via CAT5E/CAT6 cable to a switch or WiFi. If wired, these devices must be connected to the switch in ports 3 to 24.
### 5. Edge Switch
An edge switch is used to reduce the number of CAT5E/CAT6 cables you have to run to the office switch. Typically there is one edge switch per checkout lane.
Edge switches must be installed inside a weatherproof enclosure. These switches are PoE and supply power to other PoE devices on the lane, so any water intrusion can damage both the switch and every device it powers.
Any weatherproof enclosure will work. We have seen good results with these options from UniFi:
* [UniFi Switch Flex Utility](https://store.ui.com/us/en/category/switching-utility/products/usw-flexutility)
* [UniFi Flex Utility Pro Enclosure](https://store.ui.com/us/en/category/switching-utility/products/uacc-flex-utility-pro)
If you supply your own enclosure, it must house a 107.2 mm x 70.2 mm x 21.2 mm switch with additional room for cable runs.
Make sure unused ports are covered with the provided dust protectors to prevent damage.
## Connect Peripherals
Peripherals are devices that connect to the network via CAT5E/CAT6 cable to a switch or WiFi. If wired, these devices must be connected to the switch in ports 3 to 24.
### 5. Edge Switch
An edge switch is used to reduce the number of CAT5E/CAT6 cables you have to run to the office switch. Typically there is one edge switch per checkout lane.
Edge switches must be installed inside a weatherproof enclosure. These switches are PoE and supply power to other PoE devices on the lane, so any water intrusion can damage both the switch and every device it powers.
Any weatherproof enclosure will work. We have seen good results with these options from UniFi:
* [UniFi Switch Flex Utility](https://store.ui.com/us/en/category/switching-utility/products/usw-flexutility)
* [UniFi Flex Utility Pro Enclosure](https://store.ui.com/us/en/category/switching-utility/products/uacc-flex-utility-pro)
If you supply your own enclosure, it must house a 107.2 mm x 70.2 mm x 21.2 mm switch with additional room for cable runs.
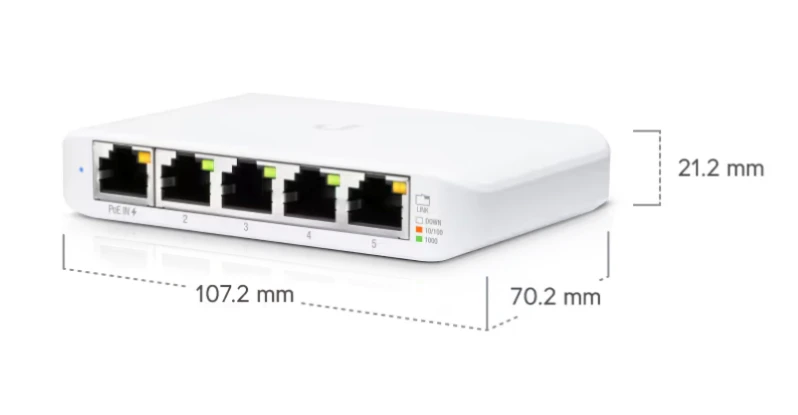 Connect the edge switch port 1 to port 17-24 in the office switch.
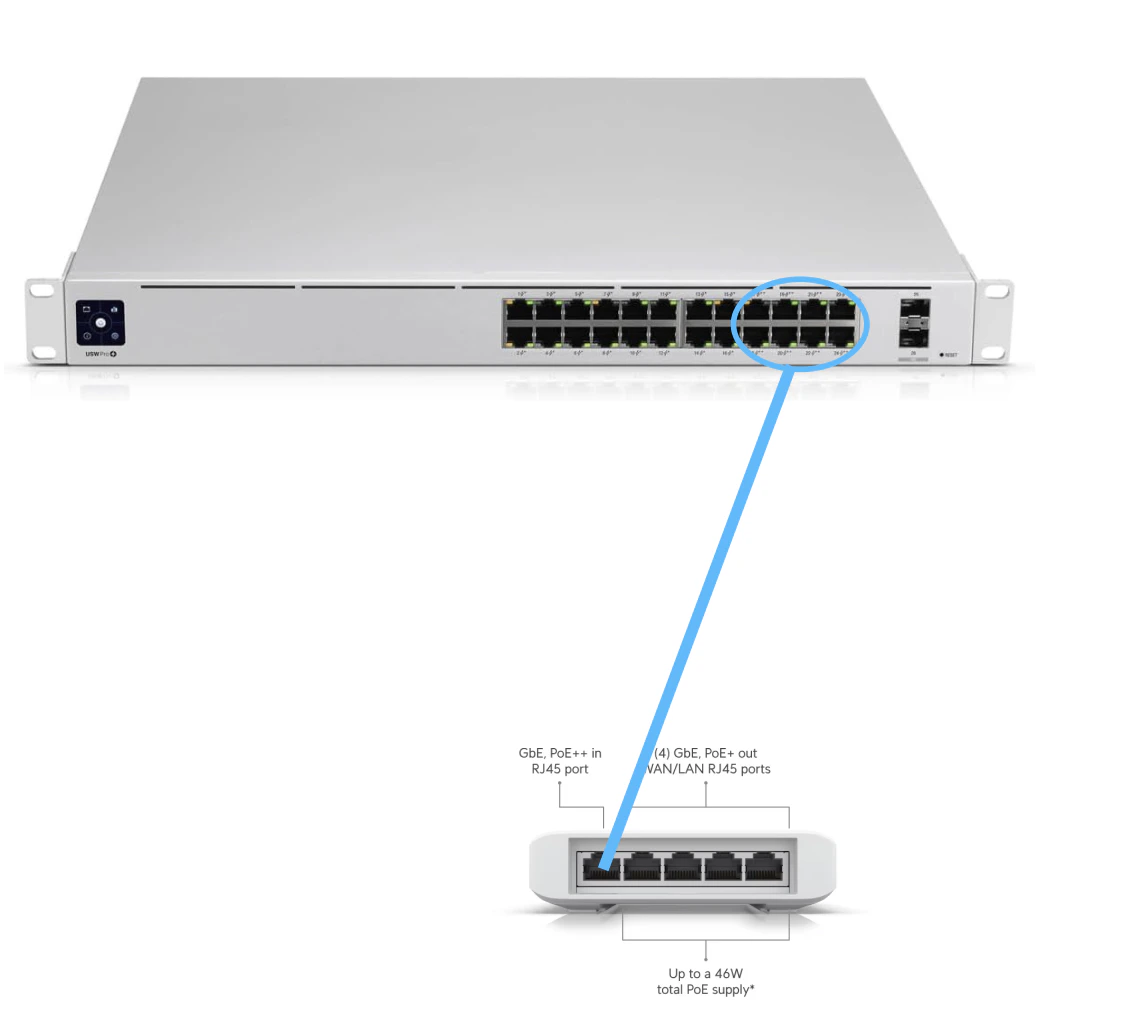 Other peripherals are plugged into port 2 to 5 on the edge switch.
### 6. WiFi Access Points
For best network performance, maintain direct line of sight between your POS and access point. Do not place access points behind walls or inside metal enclosures.
Connect the WiFi access point. These can be connected either
* directly to the switch in the office (ports 3-24)
* to an edge switch (ports 2-5)
Other peripherals are plugged into port 2 to 5 on the edge switch.
### 6. WiFi Access Points
For best network performance, maintain direct line of sight between your POS and access point. Do not place access points behind walls or inside metal enclosures.
Connect the WiFi access point. These can be connected either
* directly to the switch in the office (ports 3-24)
* to an edge switch (ports 2-5)
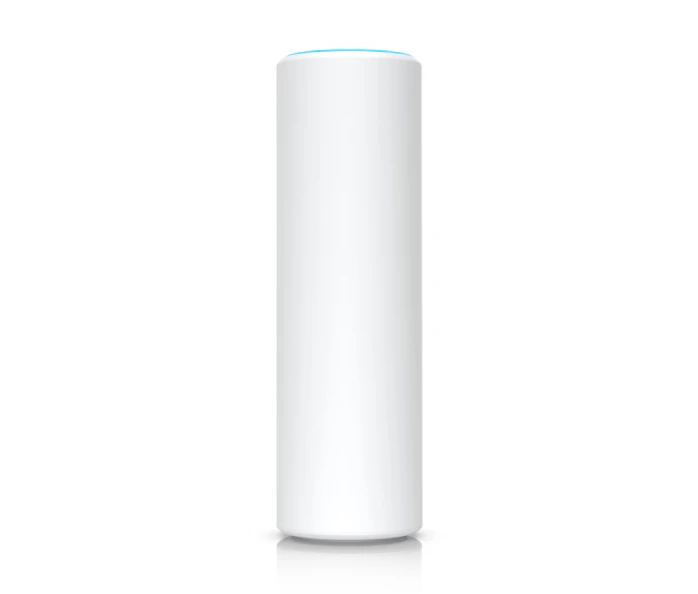 We will need access points wherever you need to work with FlexWash wirelessly. Typically there is one to cover the office/lobby area, one to cover the checkout area, and one to cover the vacuum lot if you plan on selling there.
These access points are PoE (power over ethernet) and outdoor rated as long as they are installed correctly.
### 7. Gates
Connect the gate to an open port in the edge switch. FlexWash supports [Elka](/technical/hardware/elka-gates) and [Magnetic](/technical/hardware/magnetic-gates) gates. See linked docs for more specific information.
### 8. LPR Cameras
Connect the cameras to the edge switch in the corresponding checkout lane. See [LPR installation docs](/getting-started/equipment-installation/lpr-installation) for detailed instructions.
Carefully ensure the weatherproof seal on the camera is not broken to prevent water damage.
### 9. RFID Reader
Connect the RFID to the closest edge switch. Make sure to use the outdoor rated coupler correctly to prevent water damage. See [RFID reader docs](/technical/hardware/rfid-reader) for more details.
### 10. Tunnel Tablet
The tunnel tablet can be either wired or wirelessly (via WiFi) connected to the FlexWash network depending on the model.
We will need access points wherever you need to work with FlexWash wirelessly. Typically there is one to cover the office/lobby area, one to cover the checkout area, and one to cover the vacuum lot if you plan on selling there.
These access points are PoE (power over ethernet) and outdoor rated as long as they are installed correctly.
### 7. Gates
Connect the gate to an open port in the edge switch. FlexWash supports [Elka](/technical/hardware/elka-gates) and [Magnetic](/technical/hardware/magnetic-gates) gates. See linked docs for more specific information.
### 8. LPR Cameras
Connect the cameras to the edge switch in the corresponding checkout lane. See [LPR installation docs](/getting-started/equipment-installation/lpr-installation) for detailed instructions.
Carefully ensure the weatherproof seal on the camera is not broken to prevent water damage.
### 9. RFID Reader
Connect the RFID to the closest edge switch. Make sure to use the outdoor rated coupler correctly to prevent water damage. See [RFID reader docs](/technical/hardware/rfid-reader) for more details.
### 10. Tunnel Tablet
The tunnel tablet can be either wired or wirelessly (via WiFi) connected to the FlexWash network depending on the model.