> ## Documentation Index
> Fetch the complete documentation index at: https://docs.flexwash.com/llms.txt
> Use this file to discover all available pages before exploring further.
# Roles
> Give every user the access they need, and nothing more.
User Roles let you define exactly what each user can see and do in
FlexWash. Build a role once, apply it to as many users as you need, and adjust
access for the entire group with a single edit.
This keeps sensitive data such as revenue reports, refund tools, and FlexEngage
campaigns in the right hands, while still giving CSAs, managers, and
specialists the tools they need to do their jobs.
## Why Use Roles
Choose from a wide range of individual permissions covering reports,
customer actions, menu configuration, FlexEngage, and more. Grant only
what each employee needs.
Define a role once and apply it to every user in that job function.
Update the role, and access changes for everyone assigned to it.
Common examples:
* A **CSA** role that allows viewing customers and washes, but not refunds or
revenue reports.
* A **Site Manager** role that adds access to local performance reports and
cash deposits.
* A **Marketing** role that unlocks FlexEngage tools and customer analytics
without exposing financial data.
## How Roles Work
FlexWash separates roles from the **Admin** role:
* **Admin** is a built-in role with full access to every feature in your
organization. Use it for owners and trusted operators.
* **Custom roles** are roles you create with a specific set of permissions.
Apply one or more custom roles to any non-admin user.
A user assigned multiple custom roles receives the combined permissions of
all of them. If any role grants a permission, the user has it.
## Create a Role
In the left sidebar, click **Roles** in the **Admin** section.
 Click the **Create** button on the top right of the Roles page to open
the role form.
Enter a clear, descriptive name such as `CSA`, `Site Manager`, or
`Marketing Lead`. Role names must be unique within your organization.
Check the box next to each permission this role should grant. Permissions
are grouped by category, including Dashboards & Reports, Customer Actions,
Menu Configuration, and FlexEngage.
Click the **Create** button on the top right of the Roles page to open
the role form.
Enter a clear, descriptive name such as `CSA`, `Site Manager`, or
`Marketing Lead`. Role names must be unique within your organization.
Check the box next to each permission this role should grant. Permissions
are grouped by category, including Dashboards & Reports, Customer Actions,
Menu Configuration, and FlexEngage.
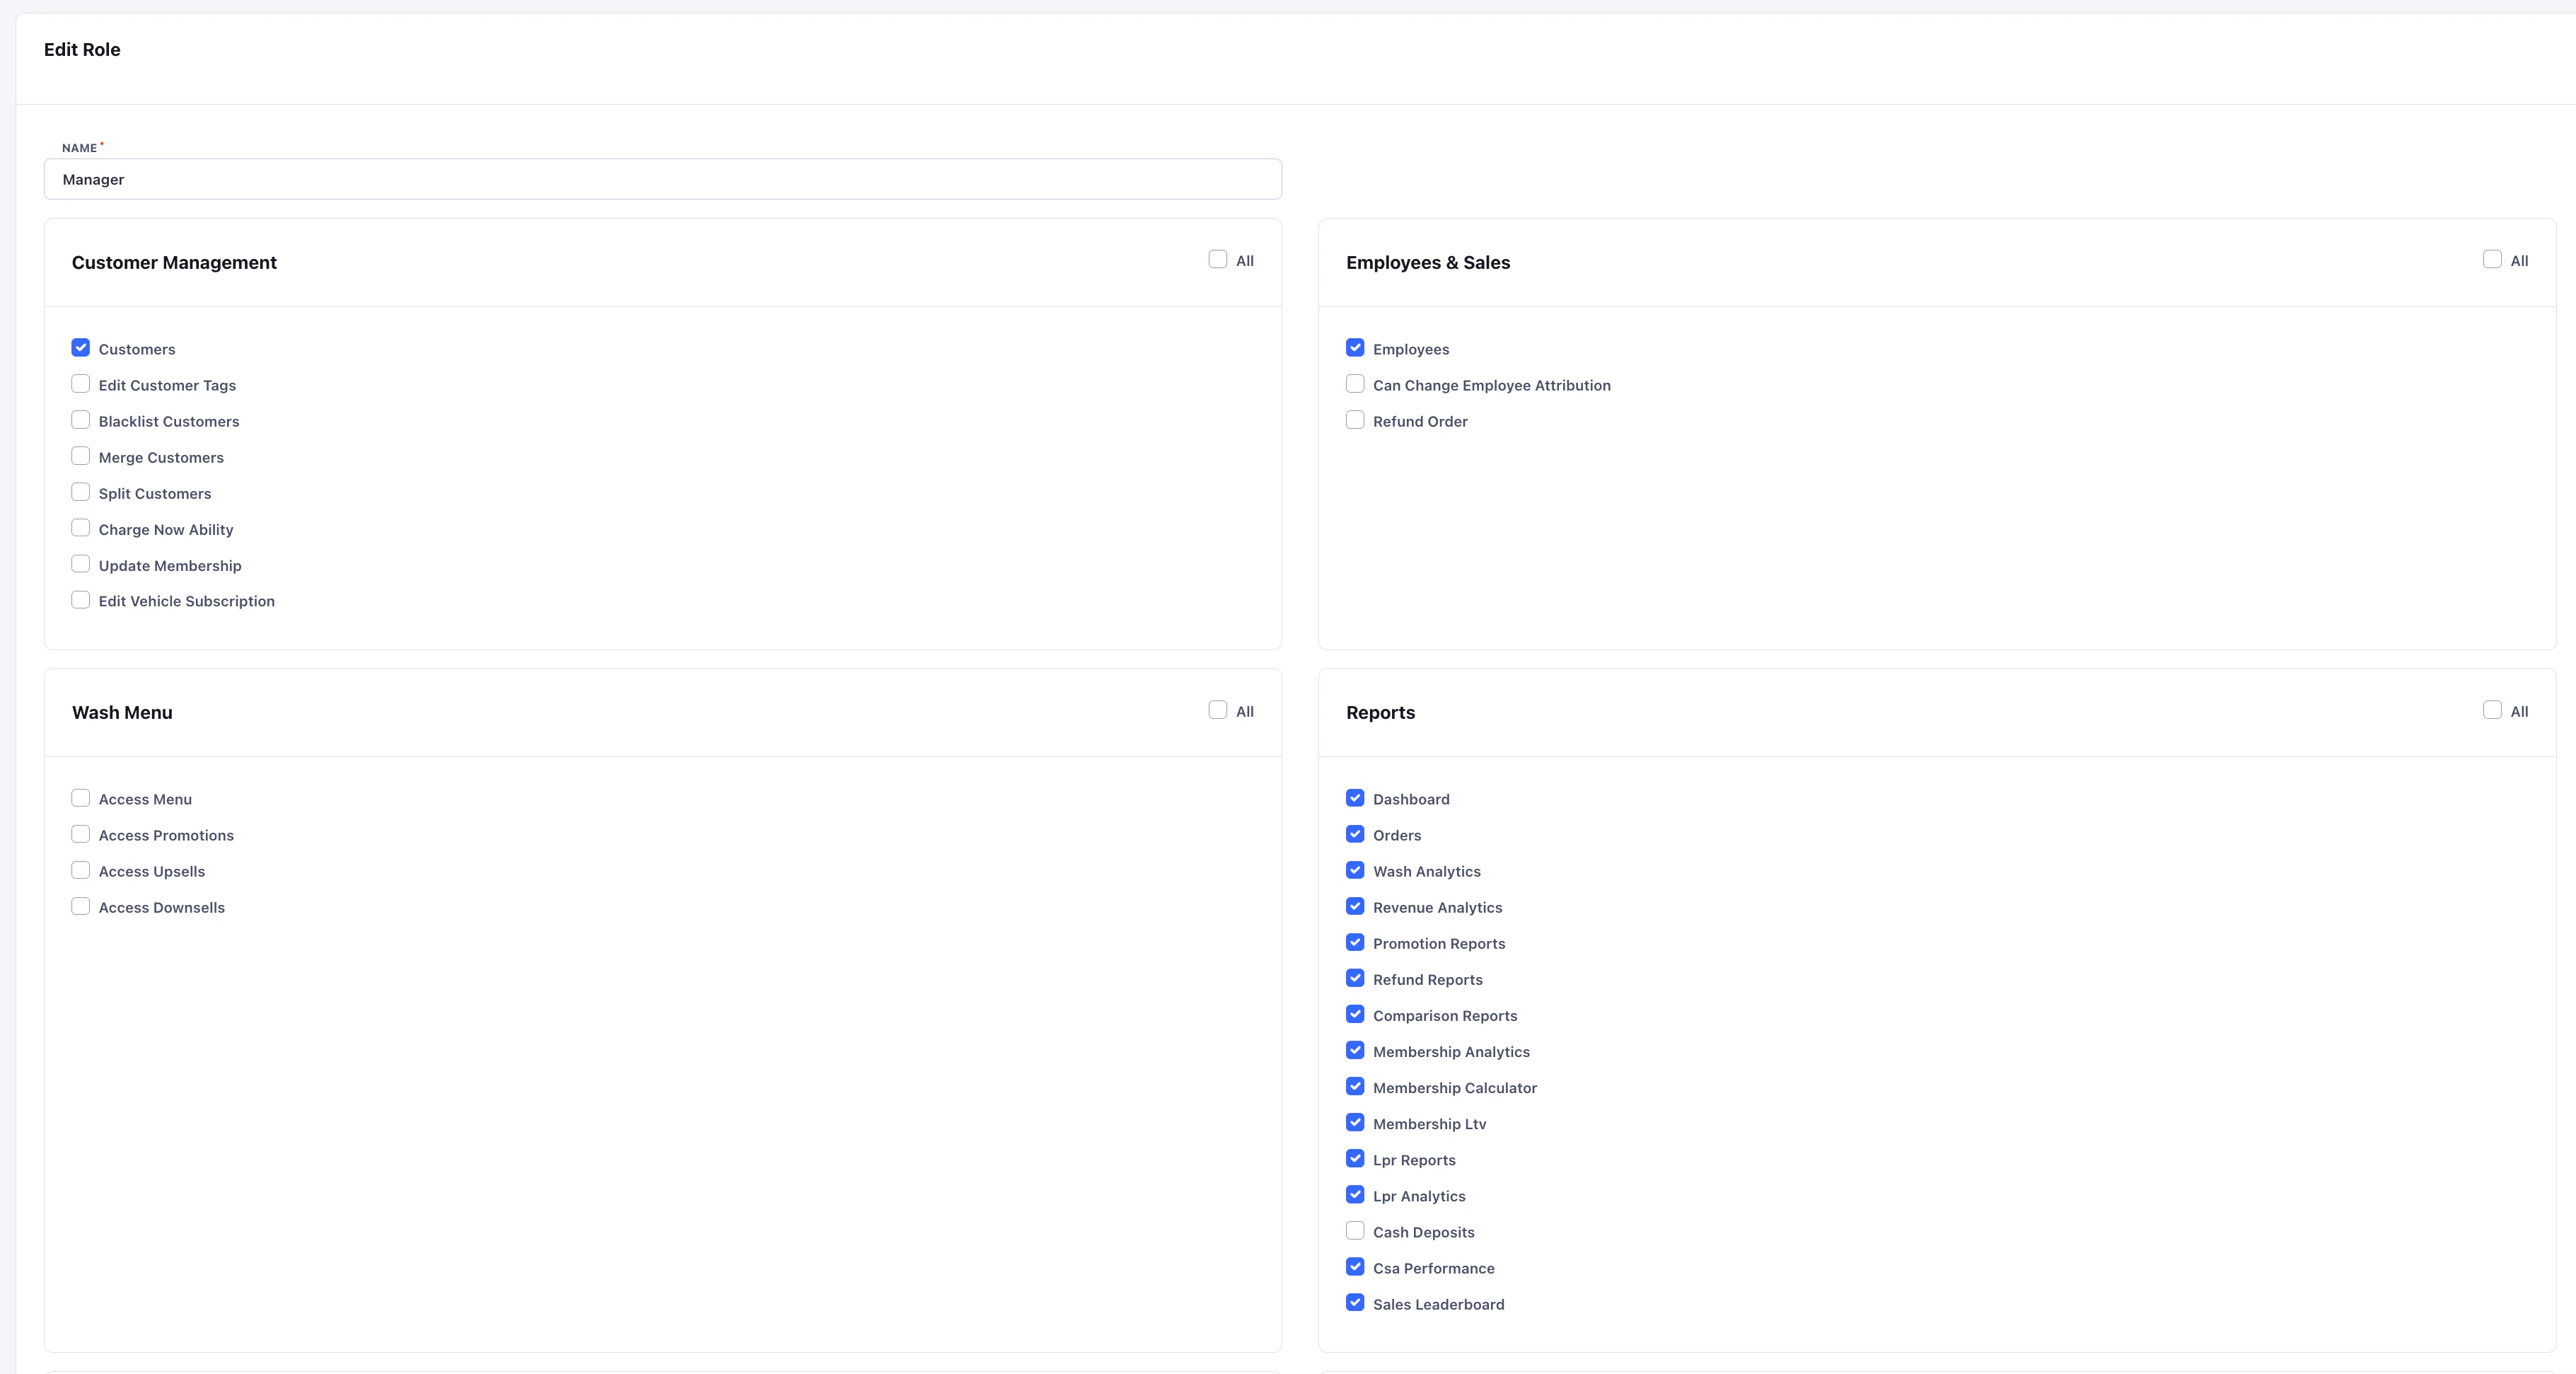 Click **Save** to create the role. It is now available to assign to any
user in your organization.
## Edit or Delete a Role
Open **Admin** > **Roles** and click the role you want to change.
* **Edit**: Update the name or adjust the permission set. Changes apply to
every user assigned to the role on their next sign-in.
* **Delete**: Roles can only be deleted if no active users are assigned to
them. Reassign affected users first, then delete.
Permission changes affect every user assigned to a role. Review who is
assigned before tightening or expanding access.
## Apply a Role to a User
You can assign roles when creating a new user or when editing an existing
one from the [users page](/configuration/users-and-admin/users).
Click **Save** to create the role. It is now available to assign to any
user in your organization.
## Edit or Delete a Role
Open **Admin** > **Roles** and click the role you want to change.
* **Edit**: Update the name or adjust the permission set. Changes apply to
every user assigned to the role on their next sign-in.
* **Delete**: Roles can only be deleted if no active users are assigned to
them. Reassign affected users first, then delete.
Permission changes affect every user assigned to a role. Review who is
assigned before tightening or expanding access.
## Apply a Role to a User
You can assign roles when creating a new user or when editing an existing
one from the [users page](/configuration/users-and-admin/users).