> ## Documentation Index
> Fetch the complete documentation index at: https://docs.flexwash.com/llms.txt
> Use this file to discover all available pages before exploring further.
# Employees
> Give every team member a personal POS login and control exactly what they can do.
Employees are the staff who sign in at the point of sale with a punch code.
Managing them lets you give each person their own login, control which
actions they can take, and attribute sales to the right team member.
Employees are separate from
[Users](/configuration/users-and-admin/users). An employee signs in at the
POS with a punch code, while a user signs in to the FlexWash admin site with
an email and password.
## The Employees List
In the left sidebar, click **Employees** to open the list. It shows every
employee for the car wash selected in the top navigation, with their role,
punch code, and assigned car wash.
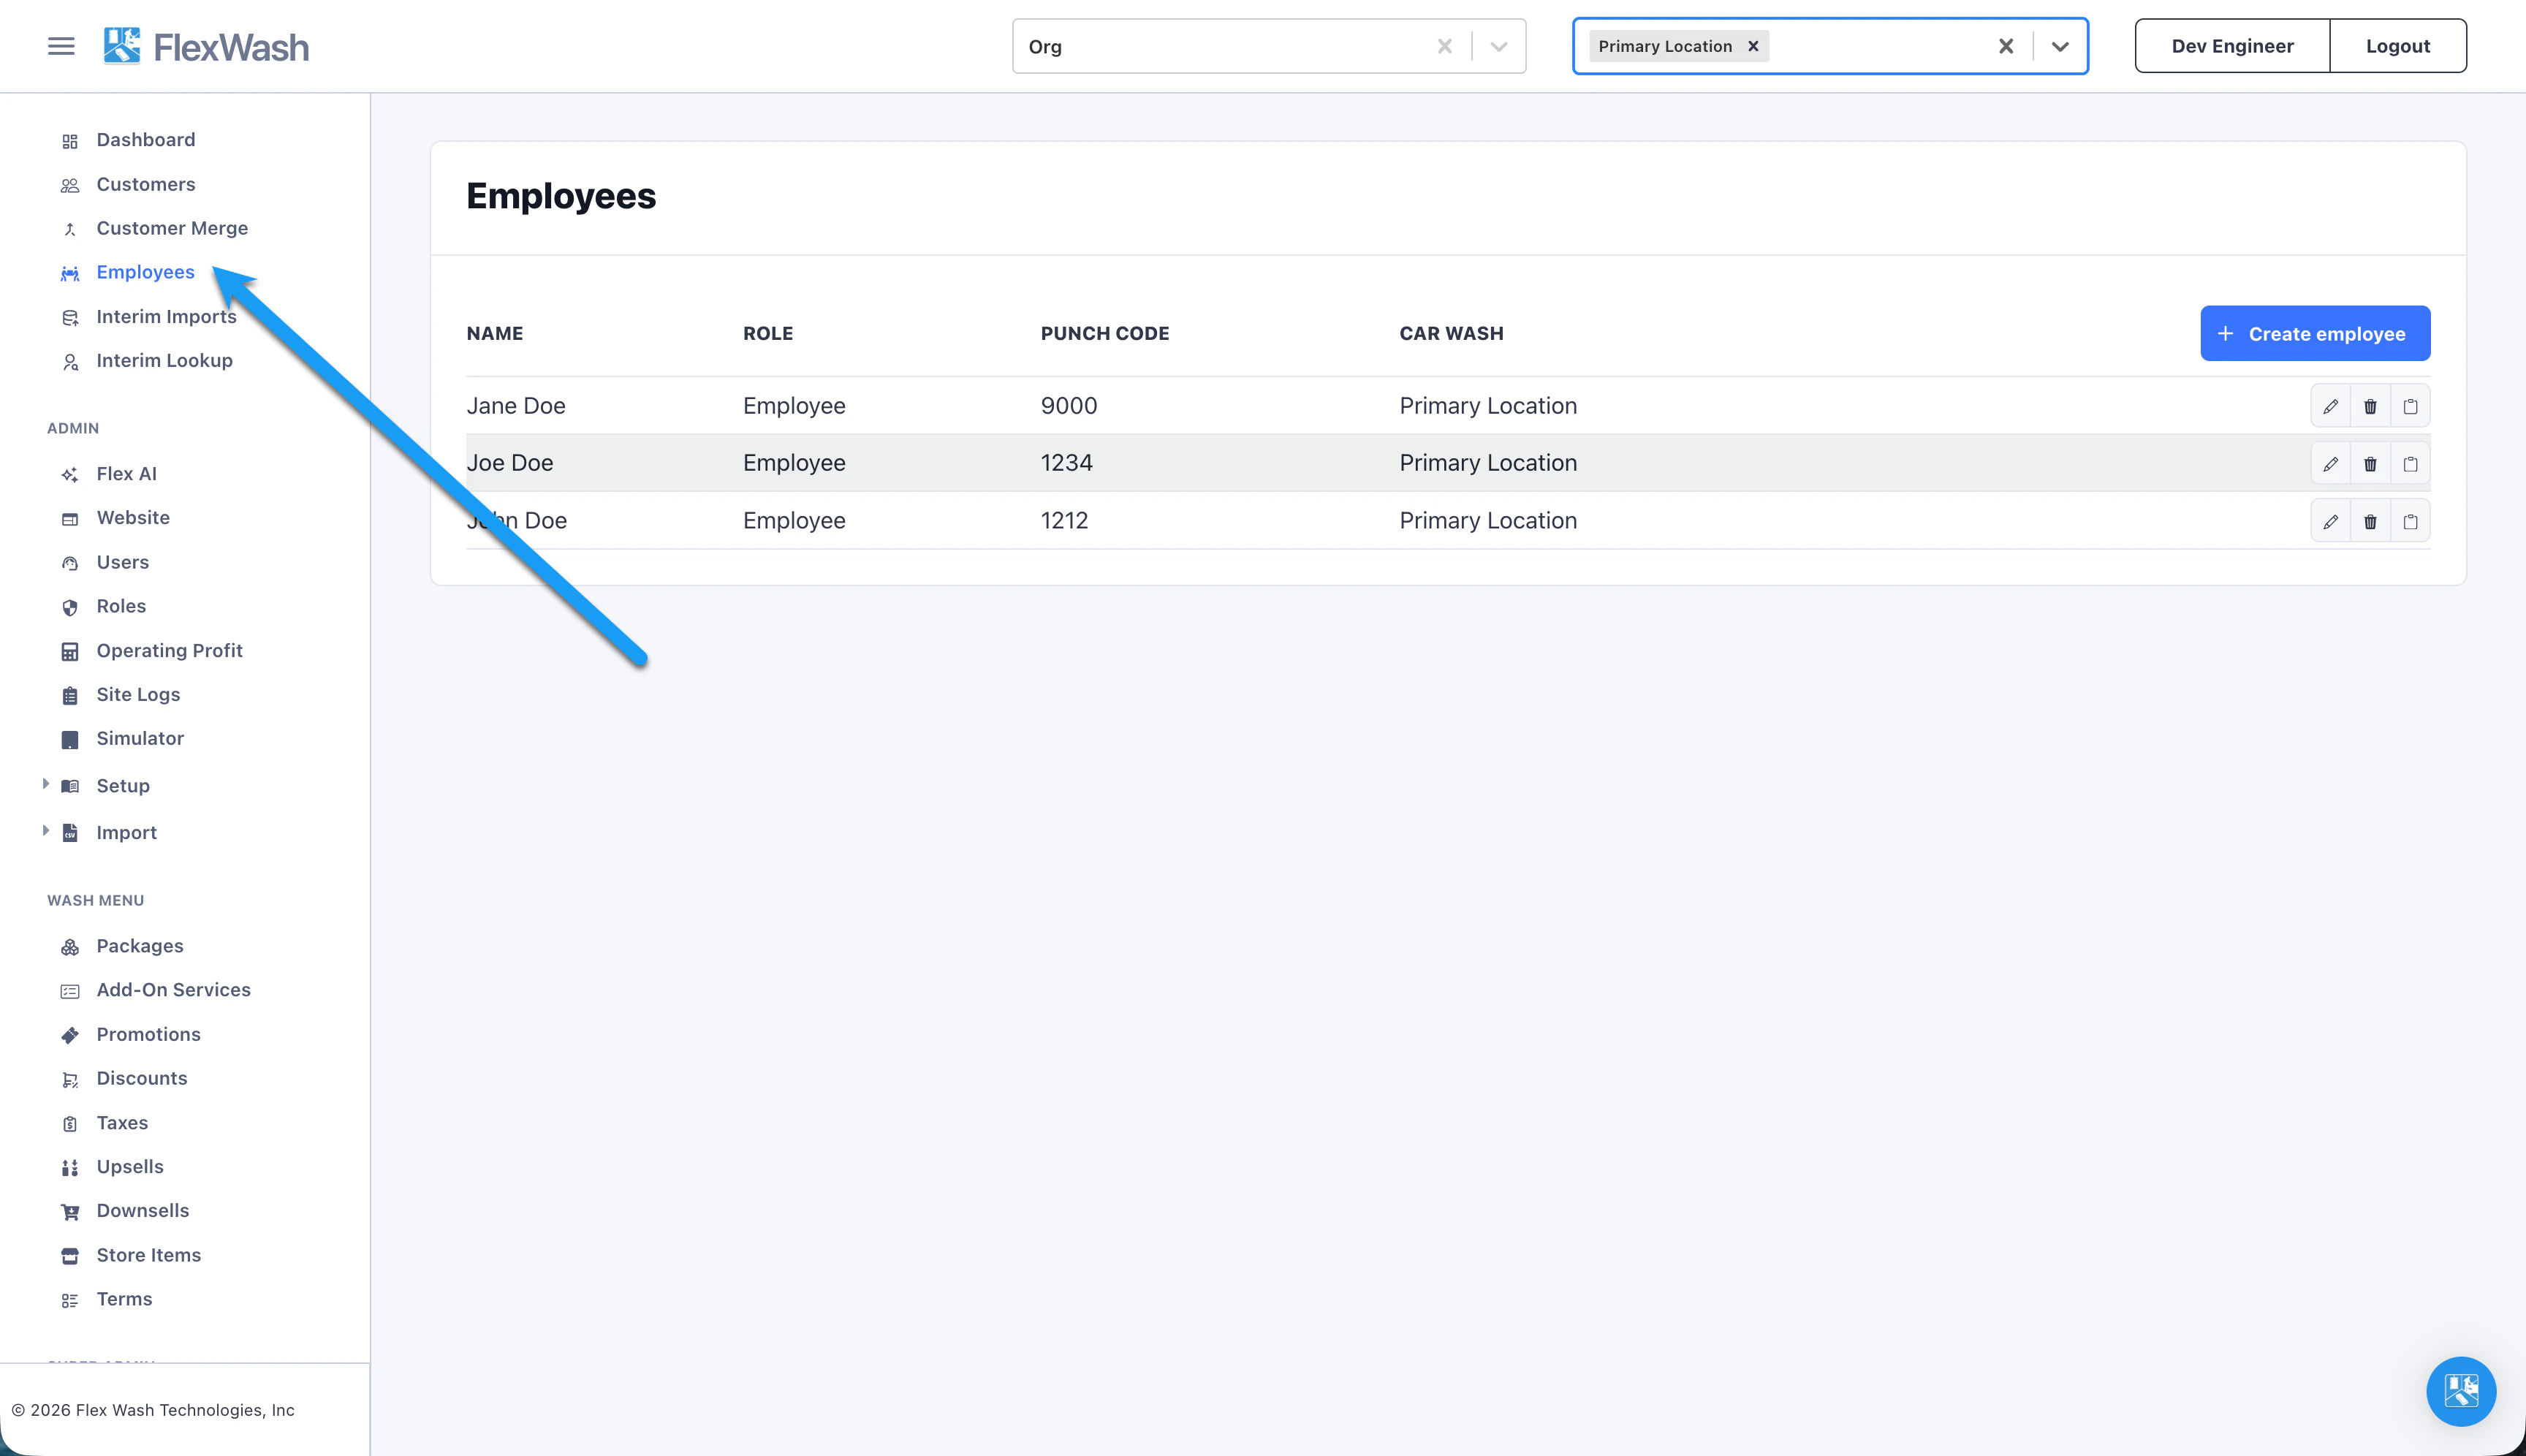 Each row has three actions: a pencil to **edit**, a trash can to **delete**,
and a clipboard to **copy the employee's ID**.
## Create an Employee
Open the **Employees** page and click **Create employee** on the top
right.
Fill in the required **Name** and **Punch Code**, then choose the
employee's **Role** and **Car Wash**.
Each row has three actions: a pencil to **edit**, a trash can to **delete**,
and a clipboard to **copy the employee's ID**.
## Create an Employee
Open the **Employees** page and click **Create employee** on the top
right.
Fill in the required **Name** and **Punch Code**, then choose the
employee's **Role** and **Car Wash**.
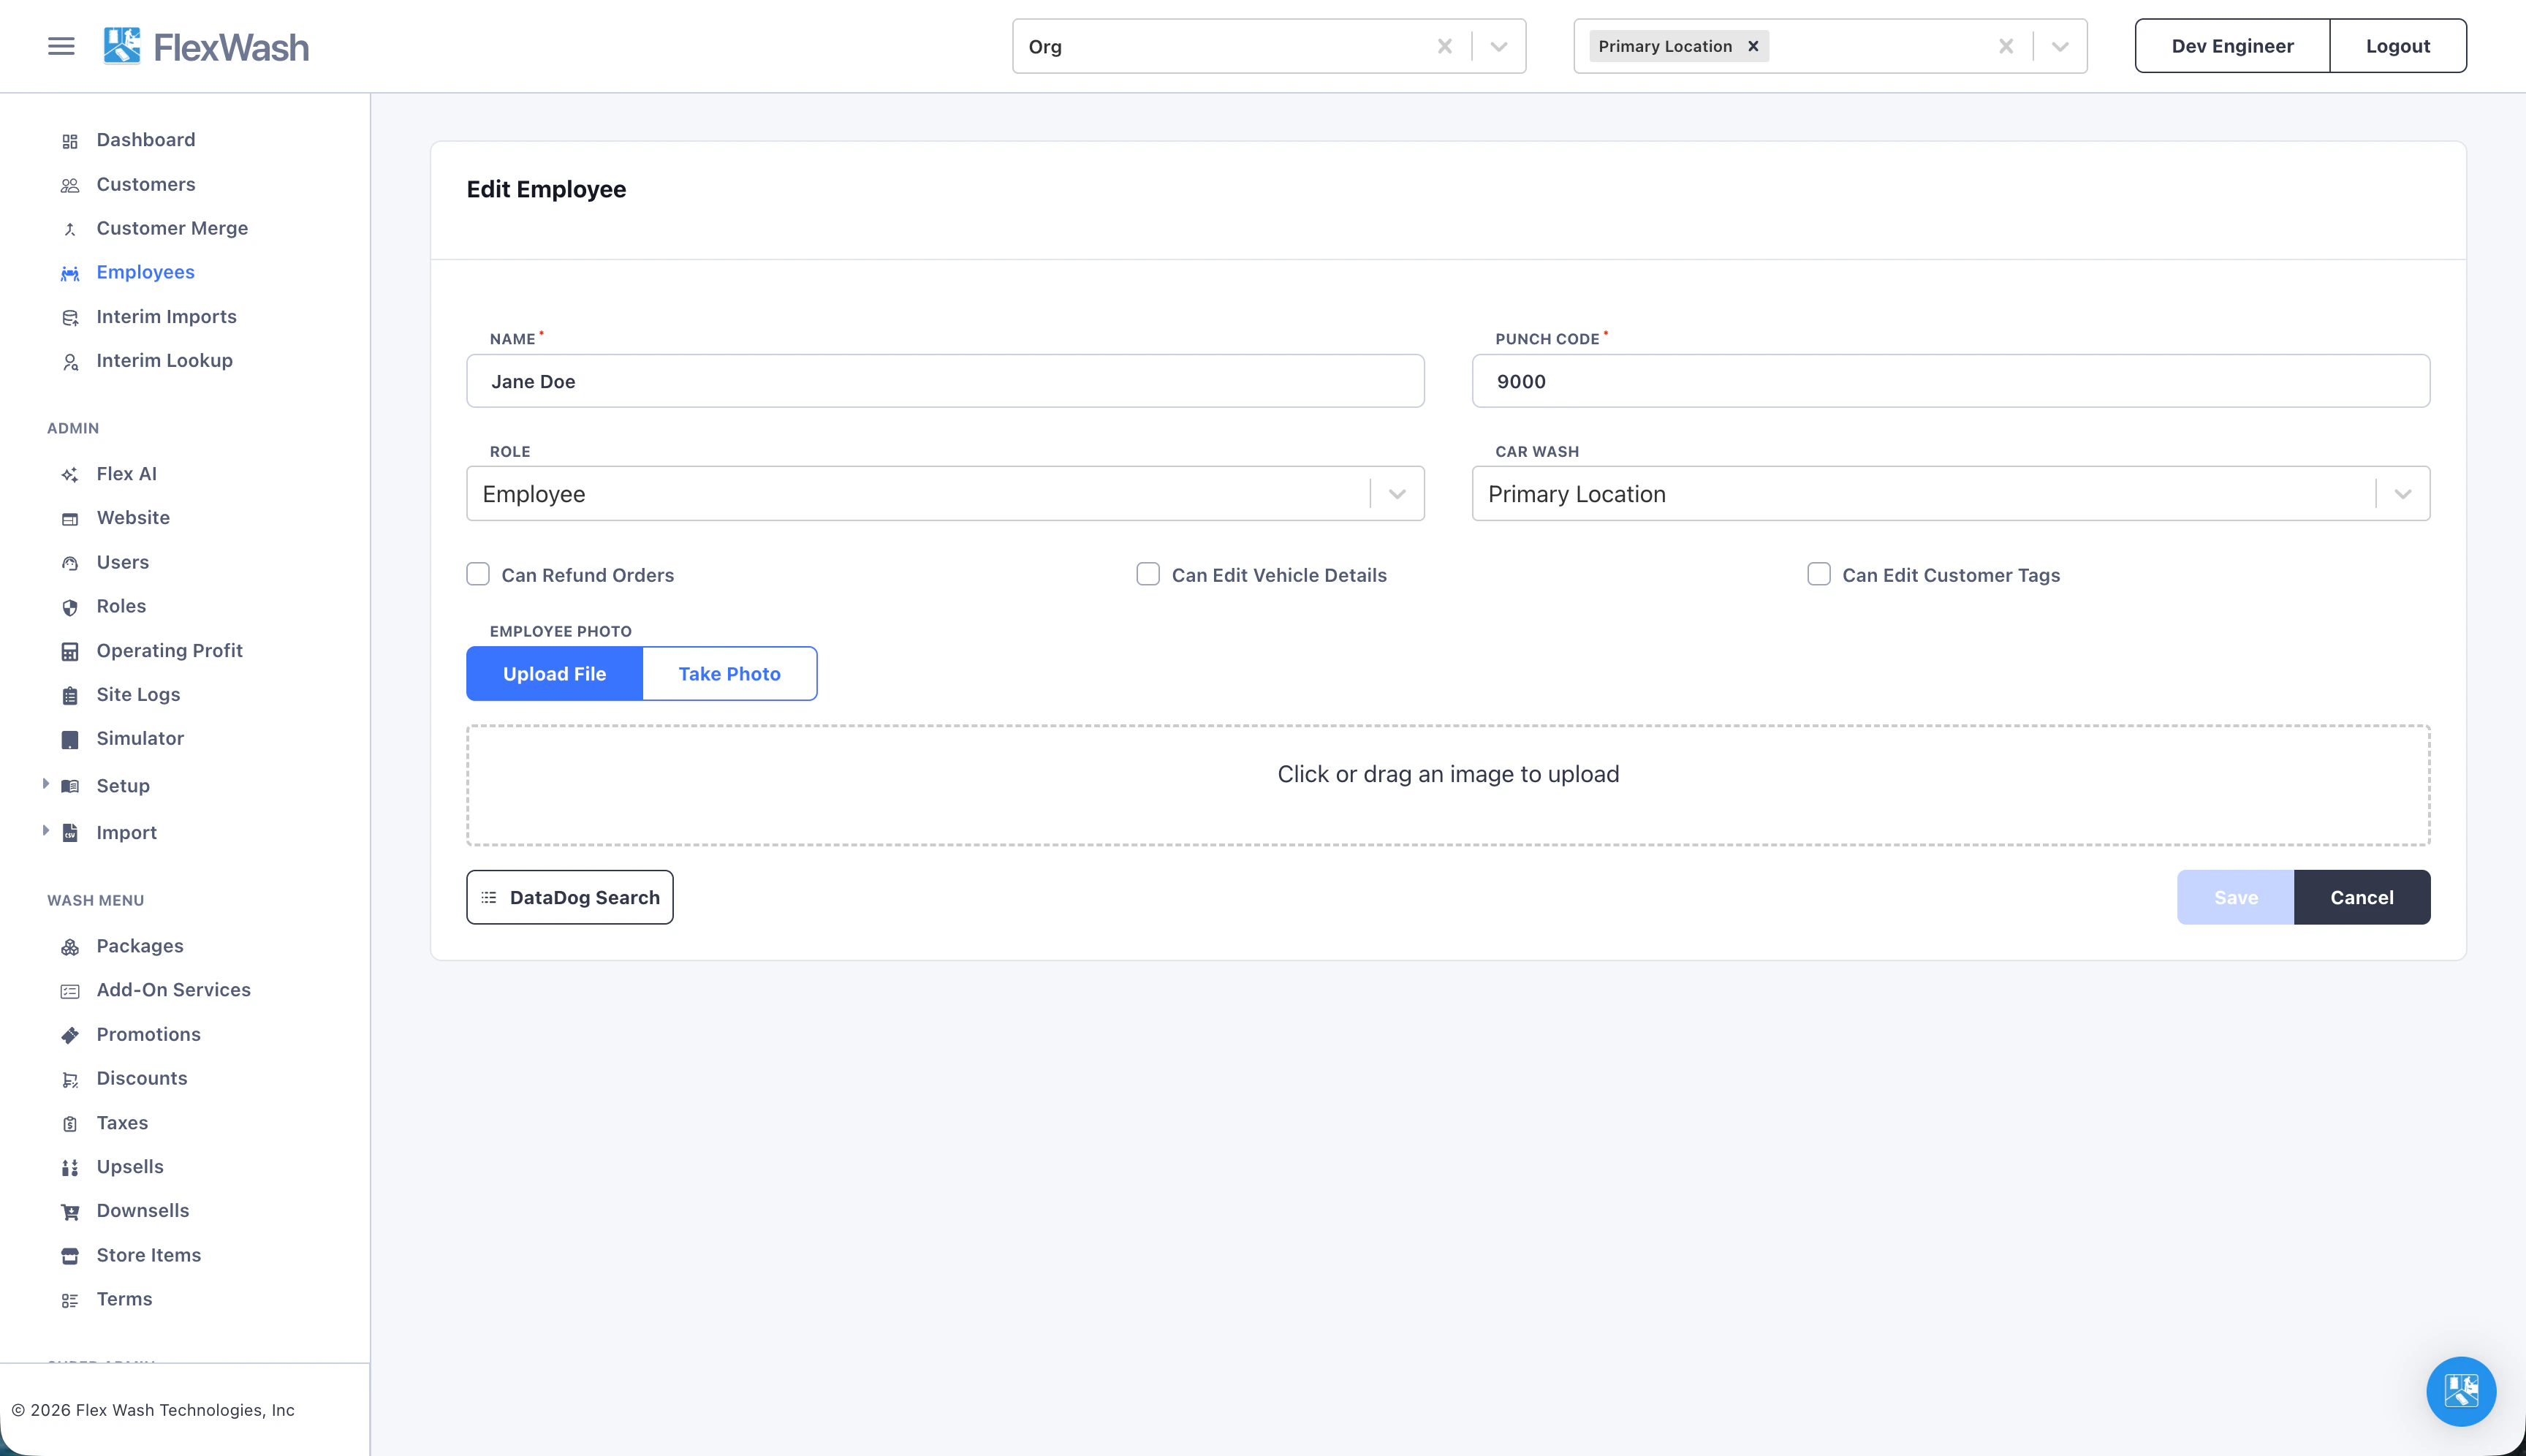 * **Punch Code**: A 4-digit number the employee enters to sign in at the
POS. It must be unique within the car wash.
* **Role**: Select the employee's role.
* **Car Wash**: The site this employee works at. Required.
Use the toggles to control what the employee can do at the point of sale:
* **Can Refund Orders**: Issue refunds on the POS.
* **Can Edit Vehicle Details**: Change a vehicle's details, such as its
license plate, on the POS.
* **Can Edit Customer Tags**: Add or remove customer tags on the POS.
Under **Employee Photo**, choose **Upload File** to select an image or
**Take Photo** to capture one with the device camera.
Click **Save** to create the employee. They can now sign in at the POS
with their punch code.
## Edit an Employee
On the **Employees** list, click the pencil icon on the employee's row. Update
any field, then click **Save**.
If you change the punch code, the new code must be unique within that car
wash.
## Delete an Employee
On the **Employees** list, click the trash icon on the employee's row, then
confirm in the dialog. The employee can no longer sign in at the POS, and their
punch code becomes available for reuse.
* **Punch Code**: A 4-digit number the employee enters to sign in at the
POS. It must be unique within the car wash.
* **Role**: Select the employee's role.
* **Car Wash**: The site this employee works at. Required.
Use the toggles to control what the employee can do at the point of sale:
* **Can Refund Orders**: Issue refunds on the POS.
* **Can Edit Vehicle Details**: Change a vehicle's details, such as its
license plate, on the POS.
* **Can Edit Customer Tags**: Add or remove customer tags on the POS.
Under **Employee Photo**, choose **Upload File** to select an image or
**Take Photo** to capture one with the device camera.
Click **Save** to create the employee. They can now sign in at the POS
with their punch code.
## Edit an Employee
On the **Employees** list, click the pencil icon on the employee's row. Update
any field, then click **Save**.
If you change the punch code, the new code must be unique within that car
wash.
## Delete an Employee
On the **Employees** list, click the trash icon on the employee's row, then
confirm in the dialog. The employee can no longer sign in at the POS, and their
punch code becomes available for reuse.